
Devils & Demons Premium MOD APK (Free Shopping)

Description
Devils & Demons Premium puts the fate of Desola on a hexagonal battlefield where one wrong class matchup against a necromancer or dragon can wipe your entire party in a single turn. This post is written for new players building their first party and returning players who have hit a wall past level 20. It covers the turn-based combat system, the class counter mechanics, Arena mode, hero recruitment, war loot prioritisation, and the tactical mistakes most guides never mention.
What Is Devils & Demons Premium and How Does It Play
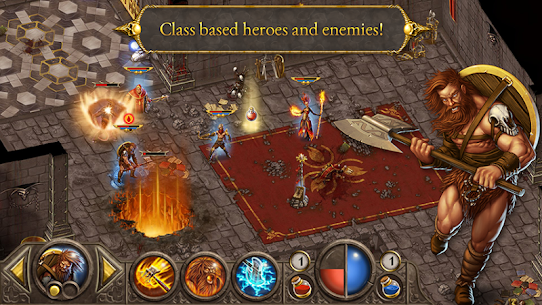
Devils & Demons Premium is a turn-based tactical RPG developed and published by HandyGames. Players assemble a party of class-based heroes and fight to protect the world of Desola from waves of demons, undead, and powerful boss enemies. The game runs as a single-player experience across hundreds of detailed maps, with an additional Arena mode for wave-based challenges. It plays completely offline and supports both Android and iOS, including full tablet display.
The core loop is fight, loot, and recruit. Each battle awards war loot. Players use that loot to upgrade heroes and unlock new skills. Then they take on the next map. It sounds simple. However, every battle layer adds new class combinations and terrain decisions that keep the loop engaging well past the opening hours.
How the hexagonal grid turn-based combat system works
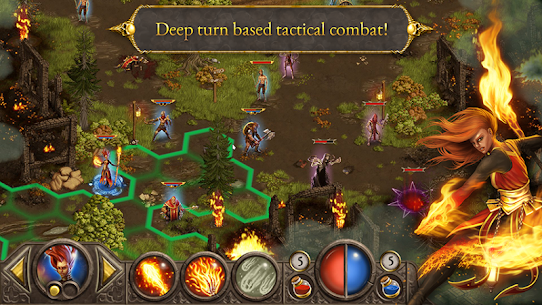
Combat in this title uses a classic hexagonal grid. Each unit occupies one hex and takes turns acting in sequence. Players move their heroes, then choose an action — a basic attack, a skill, or a spell. Enemy units then take their turns in the same pattern. This format rewards thinking two or three moves ahead rather than reacting moment to moment.
Positioning matters more than raw damage output. A warrior placed in front of a dragon absorbs punishment. An archer placed at the back of the grid fires safely over allied heads. Every hex placement is a decision with consequences. Players who treat the grid as a chessboard do significantly better than those who rush the nearest enemy.
The world of Desola, its dark fantasy tone, and story premise
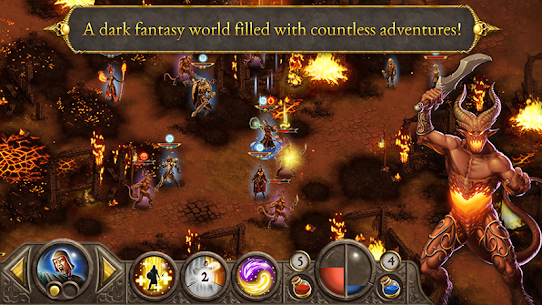
The story begins in the world of Desola at the height of its magical age. Dragons rule, order holds, and the kingdom thrives. Then a demonic portal opens in the shadowlands. Diabolic reapers flood through it. The Order of the Light scrambles to respond, but the army of men is outnumbered and in disarray. Players take the role of a commander who must assemble a party of heroes and lead the crusade against the empire of darkness.
The tone is dark fantasy throughout. The orchestral soundtrack reinforces tension during boss encounters. Voiced characters add personality to the story beats. The cut scenes use detailed HD artwork that gives each chapter of the campaign a cinematic weight that many mobile RPGs do not attempt. For a mobile title, the production value is notably high.
How Devils & Demons Premium compares to Grimguard Tactics and Age of Magic on mobile
Grimguard Tactics: Fantasy RPG is the closest mobile competitor in terms of dark fantasy setting and four-hero party combat. However, Grimguard Tactics uses a board-like battlefield with a fixed-position party layout. Devils & Demons Premium offers a larger hexagonal grid with more movement freedom per turn, giving players greater positional control during fights.
Age of Magic: Turn Based RPG is another strong mobile alternative, but it leans toward PvP arena combat and gacha hero collection. By contrast, this title focuses on a structured single-player campaign across hundreds of maps, with loot-driven rather than gacha-driven progression. For players who prefer a story-driven dark fantasy campaign over competitive multiplayer, Devils & Demons Premium is the stronger choice among current Android options.
How the Class-Based Combat System Works in Desola
The class system is one of the defining features of this game. Every hero belongs to a class — warrior, archer, mage, and similar roles — and every demon or undead enemy belongs to a class too. These classes interact with each other in structured counter relationships. Understanding them is not optional at higher levels. Mismatching your party against the enemy class composition is the single most common reason players stall after level 20.
Each class has a different stat profile. Warriors have high health and physical resistance. Archers deal strong ranged damage, particularly against flying units. Mages carry area spells that hit multiple hexes in a single turn. Because enemy waves mix class types, players need a balanced party rather than stacking any one class.
Every hero class and the enemies each one counters
Archers counter flying demon units effectively. Their ranged attacks bypass ground-level defenders and reach airborne enemies that melee warriors cannot touch. Therefore, any map that features flying demons becomes significantly harder without at least one archer in the party.
Warriors counter ground-based boss enemies, particularly dragons and physical demon types. Their high health pool absorbs the burst damage that bosses front-load in the opening turns. Meanwhile, mages counter grouped enemy formations by hitting multiple hexes per spell, which is essential during wave encounters where enemies cluster on the grid.
How skills, spells, and abilities unlock through class progression
Each hero class has a skill tree that unlocks as the hero levels up through combat and loot spending. Early unlocks tend to be passive stat increases. However, mid-tier and late-tier unlocks include active abilities — targeted spells, area attacks, buff skills, and debuff applications. These active skills shift the power curve dramatically.
Players unlock abilities by spending resources earned from map completions and war loot drops. Because each class has a unique tree, the order of unlocks matters. Prioritising area spells on mages early pays off during wave encounters. Similarly, unlocking the warrior’s damage-reduction abilities before entering dragon boss fights prevents party wipes that would otherwise set progression back by multiple stages.
Why enemy classes like flying demons and ground bosses require different hero compositions
Flying demon waves and ground boss encounters are fundamentally different tactical challenges, and the game presents both types frequently. Flying demons require ranged firepower. Ground bosses require a melee tank to anchor the front line while damage dealers work from behind.
Consequently, a party built only for one type will consistently fail against the other. The solution is deliberate party variety. Two melee heroes, one archer, and one mage covers most encounter types. However, some maps weight heavily toward one enemy class type. Scouting the map description before entering tells players which class emphasis to lean into for that session.
How to Fight and Win on Hundreds of Detailed Maps
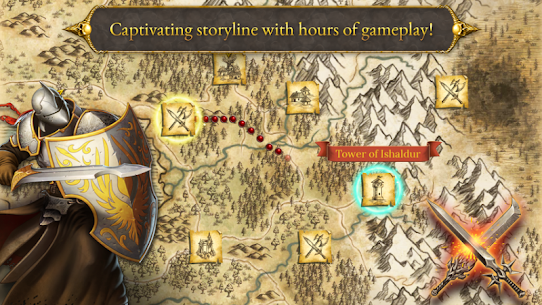
The game offers hundreds of detailed maps across the world of Desola, and each one presents a different terrain and enemy combination. This variety is one of the strongest selling points for players who enjoy strategic diversity. However, it also means that a rigid tactic that works on one map frequently fails on the next.
Every map has a defined win condition — usually eliminating all enemies or defeating the lead boss unit. Some maps add secondary conditions, such as protecting a specific hex or surviving a defined number of turns. Players who read the map objectives before placing their units perform better from turn one.
How terrain type affects unit positioning on the hexagonal grid
Different hex types on each map provide cover bonuses or movement penalties. Units standing on elevated terrain deal slightly increased damage. Units in open terrain take more hits because enemies can approach from multiple adjacent hexes at once. Therefore, the first few turns of each battle should focus on positioning heroes onto favourable terrain before engaging.
Walled or bottleneck hexes are particularly valuable for warriors. A warrior positioned at a bottleneck forces all ground enemies to file through a single approach, meaning they face only one melee attacker at a time. This dramatically reduces the incoming damage that the rest of the party absorbs per enemy turn.
How each map introduces a new enemy combination to counter
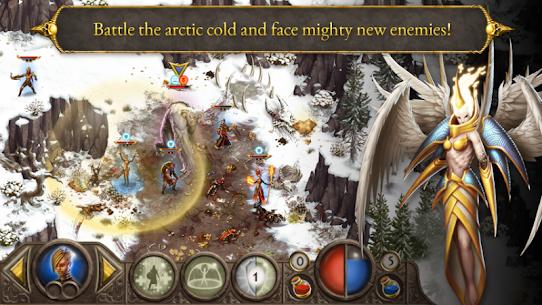
Each new map in the campaign introduces at least one new enemy class or a new combination of classes that players have not faced before. This design keeps the class counter system relevant at every stage. Early maps use basic demon waves. Mid-campaign maps start mixing flying demons into ground formations. Late-campaign maps combine ground bosses with flanking ranged enemies.
As a result, players who coasted through early maps on raw damage output hit a wall when the combination maps appear. The class counter knowledge built in earlier stages becomes essential. Players who understand the system from the start adapt faster and need fewer retries per map.
What completing a map unlocks for your party and loot pool
Completing each map awards war loot in the form of gear, gold, and experience. Gear drops are class-specific — warrior drops equip warriors, archer drops equip archers. Therefore, completing maps with a balanced party generates a broader range of loot. Players who run an unbalanced party often find themselves with surplus loot for classes they do not use and a shortage of upgrades for their core heroes.
Additionally, map completions unlock access to the next map in the campaign chain. Some map completions also open side quest encounters, which award bonus loot and skill unlock resources. These side encounters are short. However, they pay out disproportionately well relative to their difficulty, making them worth completing whenever they appear.
How the Arena Mode and Boss Fights Challenge Players
The Arena is a separate mode from the main campaign. It pits the player’s party against consecutive waves of enemies, including named boss units such as necromancers and dragons. Each wave is harder than the last. The Arena does not offer respawns between waves — the party’s health carries over, so resource management across the full wave sequence is the central challenge.
Many players ignore the Arena until deep into the campaign. This is a mistake. The Arena unlocks early and provides gear rewards that are not available from standard map drops. Some of those rewards appear only in Arena loot pools, which means skipping the mode creates gaps in a hero’s gear set that become increasingly costly in late-campaign boss fights.
How the Arena wave structure works and what it rewards
Each Arena session consists of a series of enemy waves. The first two or three waves are manageable with a mid-level party. Waves four and beyond introduce elite enemy classes and boss units that require careful ability management. Players who spend their best offensive skills in wave one often have nothing left when the necromancer wave arrives.
Arena completion awards loot based on how many waves the party clears. Clearing all waves in a session delivers the highest-tier gear available at that difficulty bracket. Moreover, repeat Arena sessions at higher brackets unlock progressively better reward pools. Therefore, returning to the Arena regularly as the party’s power increases pays consistent dividends.
Best approach for necromancer and dragon boss encounters
Necromancers in the Arena use area debuff spells that lower hero defence ratings before the necromancer itself attacks. Consequently, players need to reach the necromancer hex and disrupt its casting sequence before it can stack multiple debuffs. A high-movement warrior or a targeted mage spell solves this. Letting the necromancer cast unimpeded for two turns typically results in a party wipe.
Dragon boss encounters work differently. Dragons deal heavy single-target physical damage on each turn. A warrior anchors the front to absorb those hits while archers and mages deal sustained damage from the rear hexes. Players who move their mage into melee range of a dragon lose them in one hit. Keeping the damage dealers at maximum grid distance from a dragon is the single most important tactical decision in those encounters.
How Arena performance affects loot and hero advancement
Performing well in Arena sessions does more than generate gear. It also contributes to the overall power floor of the party by filling loot slots that campaign maps do not cover. Heroes with complete gear sets from combined Arena and campaign loot advance significantly faster through the skill unlock system.
Additionally, consistent Arena performance builds familiarity with the game’s elite enemy class behaviours. Players who run Arena sessions regularly know how necromancers open their turn sequences and how dragons prioritise targets. That knowledge transfers directly to the campaign’s later boss maps, reducing the number of retries needed on the hardest stages.
How Hero Recruitment and War Loot Build Your Party
Hero recruitment is one of the most satisfying systems in this game. Players can discover and recruit a variety of heroes as they progress through the campaign. Each hero comes with a class identity, a base stat profile, and a class-specific skill tree to develop. The recruitment pool expands as players clear new map regions, so the party available in the mid-game is significantly richer than the starting options.
War loot drops from both map completions and Arena sessions and it forms the foundation of each hero’s power. Gear slots cover weapons, armour, and accessories. Filling all slots on a hero before moving to recruit and gear a new hero is generally more effective than spreading thin upgrades across an expanded party early on.
How to recruit heroes and which classes to prioritise first
New heroes appear as rewards for completing specific campaign maps or as encounters within map regions. Players should prioritise recruiting one archer early because no other class covers the flying demon counter role. After the archer, a second warrior provides front-line redundancy. Mages can wait until mid-campaign, when grouped enemy formations begin appearing on more maps.
Recruiting a hero does not instantly make them useful. Each new recruit needs several map runs and gear investments to reach the party’s current power level. Therefore, timing recruitment to quieter campaign segments — where earlier maps can be replayed for loot — produces the smoothest power curve. Recruiting at a push into harder content leaves the new hero underpowered and the mission in jeopardy.
How war loot drops and which gear to equip on which hero class
War loot drops are class-biased but not class-exclusive. Most drops align with the classes that participated in the battle. However, some universal drops can equip on multiple classes. These universal items should go to whichever hero has the largest gear gap relative to the rest of the party.
For warriors, armour upgrades take priority over weapon upgrades because the warrior’s primary job is absorption, not damage. For archers, weapon upgrades matter most because their damage output is their entire value in flying-demon scenarios. And for mages, accessory slots often carry spell power bonuses that amplify the area damage their skills deal. Following these priorities prevents loot misallocation, which is one of the most common reasons experienced players stall in the late campaign.
What full hero advancement unlocks in the Order of the Light campaign
When a hero reaches the top of their class skill tree, the Order of the Light campaign opens new story sequences tied to that character’s arc. These sequences award unique loot that cannot drop from any other source. The items are specifically designed to complement that hero class’s role, so a fully advanced archer receives gear that reinforces ranged attack power.
Beyond the story sequences, fully advanced heroes gain access to a secondary passive ability tier. These passives apply every turn without spending an action, which effectively adds a free bonus to the party’s output per round. The compounding effect of multiple fully advanced heroes with active passives is noticeable against later boss encounters and is one of the strongest long-term incentives to invest deeply in each hero’s skill progression.
What Most Players Get Wrong in Devils & Demons Premium
Most negative reviews of this title share a pattern. Players hit a wall around level 20 to 25 and attribute it to the game becoming pay-to-win or repetitive. However, the wall almost always reflects three specific tactical errors rather than a design problem. Fixing those errors removes the stall almost entirely and the game opens back up.
The three errors are ignoring class counters, misallocating war loot, and skipping the Arena. Each one compounds the others. A player doing all three simultaneously will absolutely stall in the late campaign. A player who addresses all three will clear those same levels with the existing party.
Why ignoring class counters on hexagonal grids causes late-game stalls
The hexagonal grid punishes parties that lack class variety because the grid allows enemies to surround isolated units. A warrior-only party gets flanked by flying demons from above and ground units from three adjacent hexes simultaneously. The warrior’s armour rating is irrelevant when four units attack in the same turn.
The solution requires going back to the class counter table covered earlier. Identify which enemy types appear on the next map. Then ensure the party includes the class that counters each type. This single adjustment resolves the majority of level 20-plus stalls without requiring any additional purchases or grinding.
How misallocating war loot between heroes slows progression past level 20
War loot misallocation happens when players equip the strongest item on whichever hero they like most rather than on whichever hero class benefits most from that item type. As covered earlier, armour goes to warriors, weapon upgrades go to archers, and accessory slots go to mages. Deviating from that priority early creates a gear imbalance that becomes harder to correct as higher-tier loot enters the pool.
The consequence is a party where one hero is over-geared and others are under-geared. On late maps where the enemy targets the weakest link, an under-geared hero dies first and the party loses its class balance mid-battle. Redistributing loot allocation to fill each hero’s critical slots first solves this without additional grinding.
Why skipping the Arena early means missing key gear upgrades
Players who skip the Arena until campaign progression forces the issue arrive at it under-prepared and under-geared. The Arena’s reward pool includes items that campaign maps do not drop. Some of those items are best-in-slot for specific hero classes at the mid-game power tier.
By skipping the Arena during the mid-campaign phase, players deny their heroes these items for an extended period. The result is that campaign maps in the same tier feel harder than intended because the party’s gear ceiling is lower than the map’s design assumes. Running the Arena every few campaign maps keeps the gear ceiling aligned with the progression curve and eliminates that artificial difficulty spike.
Best Devils & Demons Premium Tips and Tricks for Beginners
Starting the right way in this game saves significant time later. The turn-based format gives players all the time they need to think. However, new players often rush their decisions because the early maps feel forgiving. That habit creates problems when the class diversity of enemy waves increases in the mid-campaign.
Three tactical habits, applied from the first session, translate directly into smoother progression across every stage of the game. Each one targets a specific area where the hexagonal grid, the class counter system, and the skill economy reward deliberate play over instinct.
How to position hero classes on the hexagonal grid before each fight
Before moving a single unit, spend ten seconds identifying the bottleneck hexes on the map. These are the narrow passages where enemies must group to advance. Place the warrior at the nearest bottleneck. Place the archer two to three hexes behind, with clear line of sight to the approach lane. Position the mage at the maximum distance from the expected contact point.
This opening formation ensures that the warrior absorbs first contact, the archer covers the air lane, and the mage can cast area spells without taking damage. Adjusting this formation based on the specific terrain of each map takes practice. However, the underlying principle — tank forward, ranged units back, mage at maximum distance — applies reliably across the full range of map types in the game.
How to prioritise hero recruitment over loot upgrades in the early Order of the Light campaign
In the first ten maps of the Order of the Light campaign, the temptation is to pour all war loot into the starting warriors. However, recruiting an archer as early as possible matters more than over-upgrading the initial party. Without an archer, several mid-campaign maps that feature flying demons become near-impossible to complete efficiently.
Therefore, when a recruitment opportunity appears, take it before spending loot on redundant upgrades to existing heroes. Accept that the new archer will arrive underpowered. Then replay one or two completed maps to farm the gear needed to bring them up to speed. This short-term investment pays back quickly when flying demon maps begin appearing.
How to read enemy class types before committing your spell and ability uses
Every map shows the enemy roster before the fight begins. Spend thirty seconds reading which enemy classes appear and in what number. Then decide which abilities to hold in reserve for the highest-threat class. For example, if three flying demons appear alongside ground units, hold the archer’s strongest skill for the flying demons rather than spending it on ground units in the opening wave.
Ability uses are a finite resource per battle. Spending them in the wrong order is the most common reason well-geared parties still lose maps in the late campaign. Reading the enemy class roster and assigning ability priority before the first turn takes less than a minute and significantly reduces the number of retries needed on any given map.
Frequently Asked Questions About Devils & Demons Premium
Is Devils & Demons Premium available on Android and iOS?
Yes. Devils & Demons Premium is available on both Android via Google Play and iOS via the App Store. HandyGames developed and published the title for both platforms. It runs offline on either platform without requiring a connection. Full tablet display support is also built in, making it playable on larger screens without any loss of visual quality.
How difficult is Devils & Demons Premium and how long does it take to finish?
Devils & Demons Premium starts accessible but increases steadily in difficulty. Most players report that the challenge becomes significant between levels 20 and 30, particularly once enemy class combinations diversify. The main campaign spans hundreds of detailed maps, giving players many hours of content. Completion time varies by playstyle but typically runs between fifteen and thirty hours for the campaign alone.
Does Devils & Demons Premium have offline play and replayable content?
Devils & Demons Premium is fully playable offline from the first session. No internet connection is required for the campaign or the Arena mode. Replayability comes from the Arena’s escalating difficulty brackets, which reward replaying sessions at higher tiers for better loot. Map replays for loot farming also extend the useful life of the content well past the campaign’s final stage.
Why Devils & Demons Premium Rewards Tactical Players Who Stick With It
Devils & Demons Premium is the right game for players who enjoy dark fantasy settings, hexagonal grid combat, and a class system with genuine strategic depth. It suits solo players who want a structured campaign over dozens of sessions rather than a quick arcade loop. The Arena mode adds a separate challenge track that keeps the experience fresh after campaign completion. Having played through the mid-campaign class counter system myself, the moment a well-timed mage area spell disrupts a necromancer’s debuff sequence is genuinely satisfying in a way few mobile RPGs replicate. This title does not hold your hand past the opening maps. Players who engage with the class system, the gear allocation, and the Arena from the start will find one of the more rewarding turn-based experiences available on Android and iOS today.
Images
Download links
ℹ️ Download link not working? Please refresh the page and try again.
Developer's apps





Related apps


What's new
Increased target SDK to support latest Android versions Support for full screen on devices with notch Support for 16KB Page Size Switched to Unity Ads
New Apps
Most Played Mobile Games


