
Glory of Generals 3 MOD APK (Unlimited Medals)

Description
Glory of Generals 3 hands you more than 100 real World War II commanders and asks you to win six war zones with them. New commanders who keep losing armor inside the first ten turns will find the deployment order that fixes it here. Replenishing a unit you already own never touches the campaign supply bar, and that single rule decides how far an opening army stretches.
How to Play Glory of Generals 3 on Android
Glory of Generals 3 is a turn-based World War II game played on a hex grid where you command historical armies one unit at a time. You choose the Axis or the Allies and then fight more than 120 scripted battles spread across six war zones from 1939 to 1945.
EasyTech built and published it, and the studio has been making grid wargames since 2009. Google Play lists the install as free with in-app purchases. Over a million people have downloaded it there.
Because every action costs a turn, this is a thinking game rather than a reflex game. Your roster of famous commanders, your technology level and your terrain reading all matter more than tapping speed. First-time players usually underestimate how quickly a careless armor push turns into a lost campaign.
Commanding Axis and Allies Armies Turn by Turn
Each battle drops a fixed starting force onto the map, and you spend your turn moving units, firing, or holding position. Infantry, armor, artillery, warships and aircraft all behave differently. Artillery hits hard from range but folds instantly to a tank that closes the gap.
You can serve either side across the war. The Axis campaigns hand you commanders such as Manstein, Guderian and Rommel, while the Allied campaigns bring Zhukov, MacArthur, Eisenhower, Montgomery and Patton. Because both sides get full scripted runs, the same map often plays completely differently depending on which flag you carry.
The 1939 to 1945 Setting Across Six War Zones
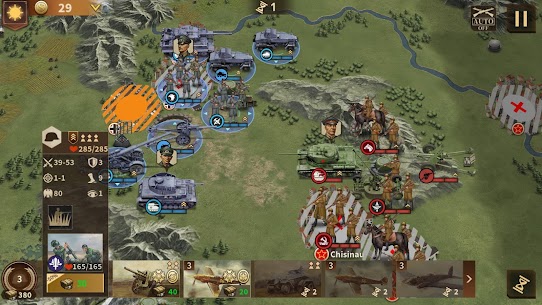
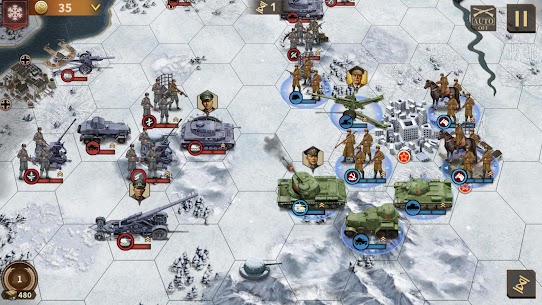
The war zones cover the real geography of the conflict. You fight through jungle beaches in the west, the North African desert, and ice and snow on the eastern line. Later updates opened the 1944 Western Front and the 1945 Pacific fighting, so the timeline now runs the full length of the war.
Military units drawn from over 200 countries appear across those zones. That variety is not cosmetic. A minor nation’s infantry starts weaker than a major power’s, so the same objective can demand a slower, more defensive plan.
World Conqueror 4 and European War 6: 1914 Compared
World Conqueror 4 is the closest Android alternative, and it comes from the same studio. It leans further into world conquest, city building and long technology trees. By contrast, this title puts more weight on scripted historical missions and tighter per-battle resource limits.
European War 6: 1914 swaps the setting to the First World War and runs a lighter general system. World Conqueror 1945 sits closer to a board game, trading unit depth for faster global rounds. Anyone who found World Conqueror 4 too sprawling will usually prefer the tighter mission structure here.
Android Version vs the Windows Store Version
The same game also sits on the Microsoft Store, so a version choice exists. On Android you get touch controls, which suit the hex grid well because tapping a unit reveals its movement range directly. Phones do make the largest maps cramped, and a tablet reads far better.
The Windows build gives you a bigger board and mouse precision, which helps when a single hex separates a clean shot from a wasted turn. However, progress does not carry across platforms, so pick one and stay there. Most players start on Android simply because the install is free there.
Glory of Generals 3 Controls, Terrain and Weather
Every unit moves and fires across a board of hexagons rather than squares, which lets attacks come from six directions instead of four. Tapping a unit lights up the hexes it can reach on this turn.
Terrain sits underneath that grid and quietly rewrites the maths. Jungle gives cover but blocks long-range fire. Desert punishes slow supply. Snow slows almost everything down.
Weather adds a second layer on top. Rain and snow drag on morale for aircraft and ground troops alike, so a bombing run planned for turn four may land far weaker than expected. Because both systems stack, a good Glory of Generals 3 strategy reads the map before it reads the enemy.
Moving Units Across the Hex Grid
Select a unit and the reachable hexes light up immediately. Hold and drag to place it, then choose an adjacent target if one sits in range. Artillery and aircraft fire further, so their attack range extends past the hexes they can actually occupy.
Positioning matters more than raw numbers. Surrounding an enemy stack cuts its retreat and multiplies your damage. For example, three infantry units wrapped around a damaged tank will finish it in one turn, while the same three attacking in a line usually will not.
How Jungle, Desert and Snow Terrain Change Combat
Jungle hexes shelter infantry and blunt incoming fire, although they also shorten sight lines and make artillery nearly useless. North African desert offers almost no cover, so armor rules there and infantry gets shredded in the open. Eastern front snow slows movement badly, which turns every advance into a commitment.
High ground is the quiet winner across all of them. Artillery parked on elevation gains range and takes less return fire. Consequently, the first thing worth checking on any new map is which hex sits highest near your deployment zone.
How Weather Drains Air Force and Army Morale
Changing weather affects the morale of air force and army units directly. Low morale means weaker attacks and softer defence, so a storm can quietly undo a plan you built two turns earlier. Aircraft suffer most, because their advantage depends on hitting hard and leaving.
The practical answer is to hold air power in reserve during bad weather and lead with armor instead. Similarly, defensive turns are cheap during a storm, so that is the moment to dig in and repair. Players who ignore the sky end up trading their best bombers for nothing.
How to Unlock Generals and Assign Them in Battle
You unlock generals by spending Medals in the shop, and campaigns also award free commanders as you clear them. Once recruited, a general attaches to one unit for a mission and lends that unit his skills. More than 100 historical commanders exist in total.
Costs vary widely. Cheap officers land within a few hundred Medals, while headline names such as Rommel or Zhukov sit far higher. Because free commanders arrive steadily, patient players rarely need to spend real money.
Skills are the real reason to care. A general who boosts armor turns an average tank into a spearhead, and Marshal Badges push those skills further. Assigning the wrong officer to the wrong unit wastes the whole slot.
Recruiting Manstein, Zhukov and Patton with Medals
The shop lists every available commander with his stats and his skill set visible before purchase. Strength, sight, movement and supply all appear there, alongside the unit types he improves. Read those numbers rather than the name.
Historical fame does not equal in-game value. Rommel is superb with armor in open desert, but a cheaper officer with an infantry bonus will serve you better on a jungle map. Therefore the smartest early purchases are usually mid-priced officers whose bonuses match the war zone you are actually stuck on.
Matching General Skills to Infantry, Armor or Navy
Every commander carries bonuses tied to specific branches: infantry, armor, artillery, navy or air force. Attach him to a matching unit and both the attack and the survivability climb noticeably. Attach him to a mismatched unit and you get almost nothing.
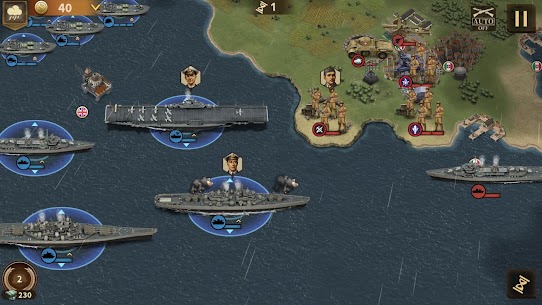
Naval missions expose this fastest. A land specialist placed on a battleship contributes so little that the ship may as well sail unled. For example, on Pacific maps a naval officer paired with your heaviest warship will often break a defensive line that three unled ships could not scratch.
Marshal Badges and Improved General Skills
Marshal Badges equip to a general and grant improved versions of skills he already has. These upgraded skills are the difference between a good officer and a mission-winning one. They are also scarce, so spreading them thinly across your whole roster is a mistake.
Concentrate them on two or three commanders you actually field. Because you can only bring a limited number of officers into any single battle, a deep bench of half-upgraded generals helps less than a short bench of fully equipped ones. Achievements are a steady source of badges, so check that list before assuming you have none.
All Special Forces Types and How Attachment Works
Special Forces in Glory of Generals 3 are elite regiments that attach to an existing unit and raise its stats for the duration of a mission. More than 60 types exist, including the German Tiger tank, Mortar Karl, the Soviet Katyusha rocket, the KV Tank, the US Army 82nd airborne regiment and the British Royal SAS regiment.
Attachment costs 6 resource points, and a unit can carry only one at a time. These regiments also cover roles ordinary troops cannot fill, such as air defence, airborne assault and construction.
Two rules catch new players out constantly. Their health never regenerates once damaged, and the unique regiments are locked to their own faction inside the Campaign. Both facts should shape when you deploy them rather than whether you own them.
Generic Attachments vs Unique Elite Regiments
Generic regiments can be assigned freely to as many units as you like, though they only bond with infantry. Transport Troops are the one exception, since they attach to artillery instead. That makes them the cheap, repeatable option for reinforcing a line.
Unique regiments work differently. Each one carries a signature ability plus a heavy damage bonus or damage reduction against one enemy type, and you may field it only once per battle. Inside the Campaign the SAS appears only in Allied missions, yet Army Group, Conquest and United Front let Axis and Allied regiments fight side by side, which makes those the ideal places to test pairings before risking them in a graded mission.
The 6 Resource Point Cost of Every Attachment
Six resource points is a real cost, not a formality. Those points compete directly with buying new units, so an early attachment can leave you a full tank short when the counterattack lands. Because of that, the timing question is more important than the choice of regiment.
Experienced players usually hold attachments until the shape of the battle is clear. Wait until you know where the enemy pushes hardest, then reinforce that hex. Spending all six points on turn one, before scouting, is the fastest way to end up strong in the wrong corner of the map.
Upgrading Elite Regiments with Assault Badges
Elite regiments upgrade three times, and Assault Badges drive that process. Once a regiment reaches its third level, Upgrade Forms, Assault Badges and Knight Badges can raise each individual stat separately. Only unique regiments can be upgraded and promoted this way.
Focus on regiments that counter what keeps killing you. If enemy armor is the problem, pour badges into an anti-tank specialist rather than spreading them evenly. Moreover, since a damaged regiment cannot be healed, an upgraded unit you deploy recklessly is worse value than a basic one you deploy carefully.
Medals, Badges and Headquarters Upgrades Explained
Medals are the spendable currency, and they buy generals plus Headquarters upgrades. Three separate badge types sit alongside them: Knight Badges raise technology, Assault Badges improve elite regiments, and Marshal Badges add general skills.
Treating all four as one pool is the single most common progression error. They come from different sources, and they buy completely different advantages. Knight Badges in particular change every future battle, while a purchased general changes only the battles he attends.
Headquarters is where long-term power actually lives. Force levels there set how strong your newly recruited units arrive, and the Financial Centre raises your income each turn. Both compound, so early investment there pays across the whole campaign.
Earning Medals from Missions and Achievements
Clearing missions is the main income stream, and finishing quickly with fewer casualties pays more than grinding out a slow win. Achievements form the second stream and award both currency and badges for tasks such as capturing set numbers of cities or destroying specific unit types. Check that achievement list early, because many of them complete naturally.
Replaying a cleared mission for a better rating is worth the time when you are short. A faster clear on a map you already understand costs perhaps twenty minutes and funds a mid-tier officer. However, do not replay the same battle endlessly, since technology upgrades give more permanent value than one extra commander.
Knight Badges and the Five Technology Branches
Knight Badges raise the technology level of five branches: Infantry, Armor, Artillery, Navy and Air Force. That level sets the starting level of newly recruited units, which in turn sets their stats. Units already above the current technology level see no change, so the benefit lands on everything you build afterwards.
Technology also carries into Army Group, Conquest and United Front, not just the Campaign. Because of that reach, it is the highest-value spend in the game for anyone under-levelled. Raise Armor and Artillery first if you play aggressively, and Infantry first if you keep losing defensive holds.
Headquarters Force Levels and the Financial Centre
Headquarters converts Medals into permanent capability. Raising a Force level lifts the starting level of newly recruited units in that branch, while raising Commander rank improves his stat bonuses such as sight and strength. Air Force upgrades additionally extend aircraft attack range and improve the infantry used for airborne drops.
The Financial Centre deserves special attention because it raises income per turn inside battles. More income means more units, more repairs, and more room for mistakes. Consequently, upgrading it early tends to make every later mission easier without you noticing exactly why.
What Campaign Objectives and the Supply Bar Do
Campaign missions mark the primary target with a red ring and secondary targets with a blue ring, and destroying the red ring target wins the battle and opens the next one. Clearing blue ring goals inside their time limit accumulates supply points for larger battles later.
Objectives vary well beyond simple elimination. You will capture target areas, rescue friendly forces, break an encirclement, defend a position, or wipe out enemy formations at scale. Some missions are survival exercises rather than victories, mirroring real retreats.
Underneath all of that sits the supply bar at the bottom of the screen. It controls how many new units you can put on the board. That number, not your Medal balance, is the real constraint in the Campaign.
Red Ring Primary Goals and Blue Ring Secondary Goals
The red ring is your win condition, so identify it on turn one and plan the route toward it before moving anything. Everything else is optional. Rushing it blindly usually fails, though ignoring it entirely wastes turns you cannot get back.
Blue ring goals are where the long-term payoff hides. They feed supply points forward into later, larger battles, so a mission cleared with only the red ring taken leaves value on the table. For example, rescuing a trapped friendly formation may cost three extra turns yet fund an entire extra armor unit two missions later.
How the Campaign Supply Bar Caps New Units
The supply bar limits how many additional units you may summon, and it also restricts which types the mission permits. Replenishing existing units, by contrast, carries no such restriction. That asymmetry is the most useful thing to understand about the Campaign, and almost nobody mentions it.
The practical consequence is simple. Keeping a damaged veteran alive and repairing it is cheaper than letting it die and buying a replacement. Therefore pulling a battered tank out of the front line for a turn is usually a better move than pushing it for one last attack.
Air Strikes, Airborne Landings and Hired Reinforcements
Beyond ordinary movement, you can call air strikes, run airborne landings, dispatch elite regiments and hire reinforcements. Each of these decisions changes the outcome of the campaign, and each competes for the same limited resources. Airborne drops in particular can seize an objective that a ground advance would never reach in time.
Air strikes work best as a softening tool rather than a finisher. Use one to knock a defended stack down to half strength, then take the hex with infantry on the same turn. Hired reinforcements, meanwhile, are worth saving for the moment a flank actually breaks rather than spending on turn two out of caution.
Army Group, United Front and Conquest Compared
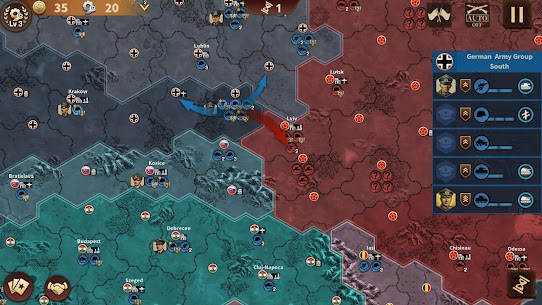
Army Group hands you a group of nations rather than a single army, and each country contributes a unique technology card that speeds up global conquest. Diplomacy runs alongside it, so today’s ally can become tomorrow’s target.
United Front takes the opposite approach. Forces are deliberately limited, every battle becomes attrition, and your score rises when you finish fast, kill efficiently and keep casualties low. Terrain reading matters enormously there.
Conquest opens the world map to a single chosen nation, with units available from over 200 countries. Scoring rewards eliminating hostile forces in the fewest rounds while holding the most territory. All three carry your technology levels forward, so progress in one helps the others.
Army Group Technology Cards and Diplomacy
Each nation in an Army Group brings its own technology card, and stacking complementary cards accelerates a run dramatically. Pick a group whose cards reinforce one plan instead of scattering across five. A group built around armor bonuses will punch through faster than a balanced one that excels at nothing.
Diplomacy decides how much of the map you fight alone. Allies absorb pressure early, though weak allies collapse and hand their cities to the enemy, which makes the opposition stronger than before. Consequently, propping up a struggling neighbour is often worth more than opening a second front of your own.
United Front Attrition and Casualty Scoring
United Front gives you limited forces and asks you to maximise combat effectiveness with them. Scores climb when you achieve goals quickly, eliminate the enemy and hold casualties down. Losing units is therefore not just a tactical setback but a direct scoring penalty.
Terrain does the heavy lifting here. Holding a jungle or elevated hex lets a single infantry unit survive attacks that would kill it in the open. Instead of trading evenly, position first and let the enemy break themselves against ground you chose.
Conquest Territory Control Across 200 Countries
Conquest lets you pick a nation and expand across the world map, drawing on military units from over 200 countries. The scoring rewards speed, so a slow grinding advance scores worse than a sharp campaign that ends early. Round count matters as much as territory count.
Early expansion should target weak neighbours with useful production, not the strongest rival on the board. Take the cheap territory first, then use its output to fund the harder war. Many players stall here because they open against a major power and never recover the tempo.
Top Mistakes That Waste Medals and Battle Turns
Three errors account for most stalled campaigns, and all three come from misreading how the game’s economies interact. New commanders overspend on named officers, throw away elite regiments they cannot heal, and let objective timers expire unnoticed.
None of these mistakes are obvious from the tutorial. Each one feels reasonable in the moment, which is exactly why they persist for dozens of hours. Fixing them costs nothing beyond changing your spending order and your habits.
The good news is that the damage is recoverable. Technology levels, Headquarters upgrades and badge investments all persist, so a corrected approach compounds quickly. A player who fixes the spending order usually clears the mission that had blocked them for a week.
Spending Medals on Generals Before Technology Levels
Buying a famous commander feels like progress because the change is visible immediately. However, that officer improves only the unit he joins, in the battles he attends. A technology level raises the starting quality of every unit you recruit from that point forward, across all four ways to play.
The better order is technology first, Headquarters second, generals third. Free commanders arrive from campaign completions anyway, so the roster fills itself over time. Players who invert this order end up with an impressive general list and an army that still starts every mission under-levelled.
Burning Elite Regiment Health You Cannot Restore
An elite regiment’s health cannot be replenished, and once it hits zero the regiment is removed from its host unit entirely. Sending one into a hex it cannot survive therefore destroys an asset permanently for that run. Many players treat these regiments as disposable damage and never work out why their best attachments keep vanishing.
Deploy them where they will absorb little return fire. Attach a unique regiment to a unit sitting behind cover or on high ground, and let it apply its bonus without standing in the open. Similarly, pull an attached unit back the moment its regiment drops below half strength.
Missing the Blue Ring Timer on Secondary Goals
Secondary goals only pay supply points when you complete them inside their time limit. Miss the window and the objective often remains completable, but the reward disappears. Because the timer is easy to overlook during a firefight, whole missions get cleared with the bonus quietly forfeited.
Plan the secondary objectives first, then the primary one. Send a fast unit toward the blue ring on turn one while your main force sets up against the red ring. That split costs nothing on most maps and keeps the supply pipeline filled for the bigger battles ahead.
Best Glory of Generals 3 Tips and Tricks for Beginners
The reinforcement system scouts enemy positions, replenishes strength and develops your regiment, which makes it a tactical tool rather than a menu chore. Using it well shortens missions noticeably.
Two other habits separate stalled players from steady ones. Artillery placement decides how much damage you take before contact, and secondary objectives fund the later war zones where difficulty spikes hardest.
None of these tips require spending money. They require reading the board for ten seconds longer before committing a turn. That habit alone lifts most players past the mission that stopped them.
Scout with the Reinforcement System Before You Commit
The reinforcement system can scout the enemy’s situation as well as supplement military strength. Scouting first tells you whether the hex ahead holds infantry you can push through or armor that will eat your advance. That information costs far less than a lost tank.
Use it before every major push, especially in fog-heavy jungle maps where sight lines are short. Then commit your heaviest unit only once you know what is waiting. Players who advance blind lose their strongest formations in the opening turns and spend the rest of the mission recovering.
Park Artillery on High Ground Against Tiger Tanks
Artillery on elevated terrain gains range and takes reduced return fire, which turns it into the anchor of a defensive line. Against heavy armor such as the Tiger tank, that range advantage is the difference between softening it at distance and meeting it at full strength. Set the guns up before the enemy closes, not after.
Screen them with infantry on the adjacent hexes. Artillery left exposed dies to a single armored charge, and replacing it inside a supply-capped mission is painful. For example, two infantry units placed in front of a single artillery piece will usually keep it firing for the entire battle.
Bank Secondary Objectives for Later War Zones
Supply points earned from secondary goals carry forward into the larger battles, so early missions are your cheapest chance to stockpile them. The opening war zones are far easier than the 1944 and 1945 fighting, which means the same objective costs fewer casualties now than later. Treat the early campaign as a funding phase.
Go back and re-clear early missions if a later one keeps beating you. The extra supply points let you field more units on the map that is actually blocking you. Although replaying feels like a step backward, it usually resolves a difficulty wall faster than another failed attempt at full strength.
Frequently Asked Questions About Glory of Generals 3
Is Glory of Generals 3 free to play on Android?
Yes. Glory of Generals 3 installs free from Google Play and carries optional in-app purchases, mainly for the currency used to recruit commanders. The download runs under 100 MB, so it fits comfortably on older phones running Android 5.0 or newer. Player reviews widely report finishing campaigns without spending anything.
Can you play without an internet connection?
Yes, the game runs fully offline as a single-player experience, which the App Store listing states directly in its subtitle. That makes it well suited to commutes and flights, since a mission can be paused mid-turn and resumed later. No live opponents or timed events depend on a connection.
Does the game still receive new content?
Yes. Updates after launch added the 1944 Western Front and the 1945 Pacific fighting, along with extra Elite levels layered into the second campaign for players who had already finished it. Development has continued for several years past release, and the studio maintains an active player community around its wargames.
Who Should Take Command in This WW2 Strategy Game
Glory of Generals 3 suits patient players who enjoy reading a board before moving a single unit. History fans who already know why Rommel belongs in the desert will get the most from it. New commanders should open on the 1939 Western Front. Spend the first few hundred Medals on technology levels instead of a marquee general. In my own runs, missions that felt impossible turned winnable once I raised Armor and Artillery technology rather than buying more commanders. This remains one of the deepest offline war games available on Android today.
Images

Download links
ℹ️ Download link not working? Please refresh the page and try again.
Developer's apps








New Apps
Most Played Mobile Games


