
Going Deeper! MOD APK (Unlocked Everything)

Description
Going Deeper! : Colony Sim drops five starting colonists onto the surface of a six layer world and asks you to dig down through all of it. New colony managers who keep losing settlers to hunger before the first goblin wave will find a working build order in the sections here. Wood and stone come first, and a well plus a market matter far more than anything decorative in the opening hour.
How to Play Going Deeper! : Colony Sim on Android
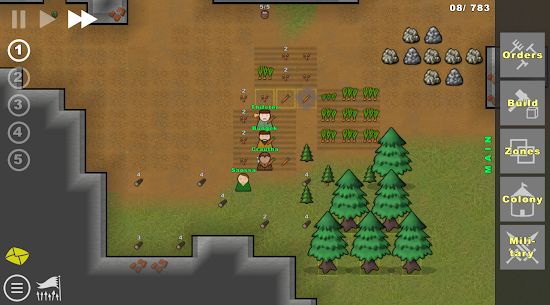
Going Deeper! : Colony Sim is an offline colony management game built around a six layer world, one surface map plus five underground levels. You start with five colonists, dig tunnels, craft gear, and defend the colony from goblin hordes across every layer.
The run begins before the map even loads. First you pick an expedition kit, and those starting items shape your whole opening. Digital Farscapes UK built the whole thing to run without a connection, so no account and no server sit between you and the save file.
Google Play shows the 100,000+ download tier and a listing that carries a 7+ content rating for mild violence and fear. Also worth knowing: the store flags ads but lists no in-app purchases, so nothing behind a paywall blocks progress. That matters in this genre, because plenty of mobile colony management titles gate build speed behind timers.
What the Six Layer World and 2×2 Tunnels Do
Six layers stack from top to bottom. One sits on the surface, and five sit underground. Each layer holds better materials than the one above it, so the depth you reach sets the ceiling on what you can build.
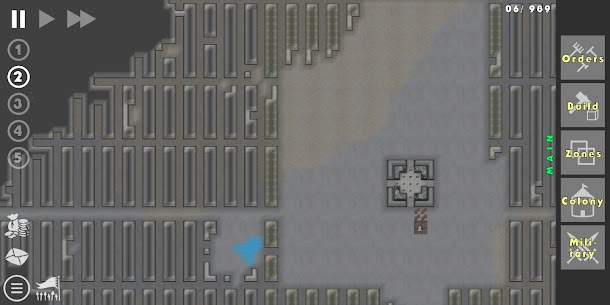
Tunnels connect those layers in 2×2 sections, which means every vertical link costs real digging time and real labour. Because your workforce starts at five bodies, a single staircase can eat an entire in-game season. Plan the route before you commit, since a badly placed tunnel drags haulers across half the map on every trip.
The Fantasy Setting, Goblin Threat, and Colony Premise
Goblin hordes are the standing enemy faction, and they attack in waves rather than sitting in fixed nests. The fantasy framing is thin on cutscenes and heavy on consequence. Nobody narrates your story, so the colony’s history ends up being whatever your decisions produced.
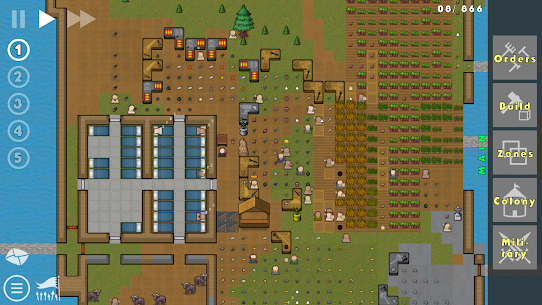
Your people arrive as an expedition into hostile ground, not as an established settlement. Therefore the early game feels closer to a survival scramble than a city builder. Walls, food, and a few armed bodies come first. Comfort comes much later, and colonies that reverse that order rarely see year three.
How It Compares to Landnama and Mindustry on Android
Landnama – Viking Strategy RPG and Mindustry both sit in Google Play’s own similar-games cluster for this title, and both run on Android. Landnama leans into settlement growth with an RPG layer, while this game keeps the focus on individual worker needs. Mindustry, by contrast, is a factory and defense hybrid where conveyor logistics carry the weight.
The clearest split is depth of simulation. Mindustry asks you to optimise throughput, whereas this title asks whether one hungry farmer will bother planting today. Island Empire – Strategy sits closer to a management sandbox with fewer individual quirks. Several reviewers describe the experience as a scaled-down take on the same design ideas that made Dwarf Fortress famous, which is a fair summary of the ambition here.
Android Version vs the Windows Version
Google Play lists the game as available on Android and on Windows, and the two versions share the same content. The Android build uses tap and drag input for every order, so precision suffers when you zone a stockpile on a small screen. On Windows the same actions land faster with a mouse.
Performance is the other real difference. A recent update focused on late-game performance, which matters most on phones once the colony grows past a few dozen colonists and several excavated layers. For that reason, players who plan long Survival runs will get a smoother ride on a larger device. The save behaviour stays identical, and the game costs nothing on either platform.
Gameplay Mechanics, Tap Controls, and Colonist Orders
Every command in this offline strategy title runs through indirect orders. You never steer a colonist directly. Instead you mark an area, set a job type, and the unit with the right skill walks over and starts working.
That indirection is the whole design. Because colonists choose their own path to a task, poor layout costs you hours of walking time. Zones, stockpiles, and workshop placement do more for output than any single upgrade.
Combat runs on the same principle. You form squads rather than controlling individual swings, and the squad handles the fight once goblins arrive. Skills, needs, and mood all feed into how reliably any of this actually happens.
Digging, Zoning, and Assigning Jobs to Colonists
Digging works by marking tiles for removal. Your miners queue up, clear the marked block, and haul the stone back to a stockpile. However, they only do this if a pickaxe exists and a hauler is free, so tool count quietly caps your dig speed.
Job assignment uses priorities per colonist rather than fixed classes. A unit good at building can still farm, just slower. For example, dropping one colonist to farming-only during your first spring usually stabilises the food supply faster than spreading the work across five people. Specialisation beats flexibility early, then flexibility wins back ground once migrants arrive.
The Needs, Mood, and Skill System Behind Each Unit
Each colonist carries individual needs, personal skills, and quirks that change how they behave. Hunger, rest, and general mood all sit on meters you can open per unit. Skills climb through repetition rather than through a menu.
Mood is the mechanic players ask about most and understand least. A colonist sliding into a sad state slows down, ignores assigned commands, and eventually stops contributing at all. Housing, food quality, and a functioning market all push that meter back up. Because the game gives almost no on-screen explanation, checking the individual unit panel is the only reliable way to catch a problem before it spreads.
What Happens When a Goblin Wave Reaches the Walls
Goblin waves arrive on a schedule that tightens as the colony grows. Armed squads intercept them, unarmed colonists scatter, and anything left undefended takes damage. Wave size scales with how developed your settlement looks.
You do not have to meet every wave head on. Many experienced players wall off territory gradually using surplus wood or stone, letting terrain do half the work. That approach buys time while the anvil produces real armor. Losing two colonists to an early wave is survivable, but losing your only miner usually is not.
How to Unlock Deeper Layers and Richer Resources
Reaching a deeper layer means excavating a 2×2 tunnel down from the level above and hauling the debris clear. Each of the five underground levels holds richer materials than the last, and each also raises the danger sitting between your colonists and those materials.
Depth is the progression curve. Nothing gates it behind a timer or a purchase. The only thing standing between you and layer five is labour, tools, and whether your colony can feed the people doing the digging.
Timing is the real skill. Push down too early and you lose miners far from home. Wait too long and you stall out on surface materials while goblin waves keep scaling. In my runs a stable colony reaches the first underground layer in roughly 30 to 45 minutes of real time, once wood, stone, and food all sit comfortably positive.
Cutting the First Staircase Down From the Surface
Site the first descent close to your stockpile, not at the edge of the map. Hauling distance compounds on every single trip. A tunnel dug twenty tiles from storage will cost you more labour over one season than the excavation itself.
Assign two colonists to the dig and leave the rest on food and building. Because tool availability caps dig speed, a third miner without a pickaxe adds nothing. Finish the staircase in one push rather than pausing halfway, since a half-open tunnel gives goblins a route inward.
Which Materials Show Up as You Tunnel Down
Surface ground gives you wood, basic stone, and farmland. The upper underground levels start yielding ore suitable for real tools and armor. Deeper still, the materials improve again, which is what makes late Campaign objectives achievable at all.
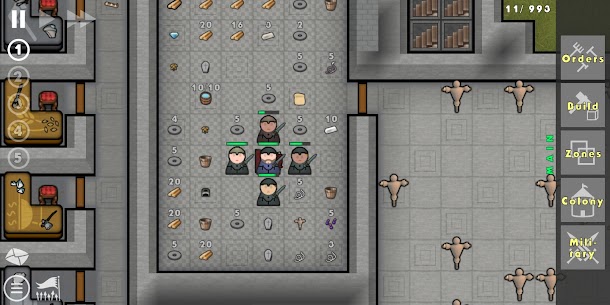
Plan storage around this. Each new material type needs somewhere to sit, and a single overflowing stockpile will stall your haulers completely. Similarly, opening a rich layer without workshop capacity just leaves valuable ore lying underground while your smiths idle upstairs.
Handling Escalating Danger as You Tunnel Down
Threat scales with depth, and it scales faster than your gear does if you rush. The deeper levels punish colonies that arrive with wooden tools and no squad. That imbalance is deliberate, since the whole risk-reward loop rests on it.
Send an armed pair alongside every deep mining crew. Also keep an escape route clear back to the surface, because a collapsed or blocked tunnel strands miners with no food. One practical habit helps enormously: never open a new layer during the week a goblin wave is due, since you cannot defend two fronts with five to ten bodies.
How to Craft Armor, Weapons, and Combat Squads
Crafting turns raw ore and wood into tools, armor, and weapons at dedicated stations, with the anvil sitting at the centre of the chain. Better gear does not appear from level ups. It appears because a skilled craftsman had materials and time.
The anvil is the item most new players almost throw away. It sits in the default expedition kit, and swapping it out for something that looks more immediately useful cripples the mid game. Without it, your first real weapons never get made.
Squads sit downstream of all this. You can nominate fighters at any point, but an unarmored squad against a scaled wave is just a slower way to lose colonists. Gear first, then formation, then the fight.
Setting Up the Anvil and Your Crafting Chain
Place the anvil under cover and near your stone and ore stockpiles. Craftsmen waste enormous time walking between scattered stations. A tight production corner outperforms a beautiful spread-out workshop every time.
Queue tools before gear. Pickaxes and axes multiply your entire workforce output, whereas a single sword helps only during a wave. Once tool count matches your worker count, shift the anvil to armor production. That order costs nothing and consistently shortens the gap between your first colony and your first successful one.
Forming Combat Squads From Your Strongest Units
Squad formation asks a question the game never answers for you. Do you pull your best builder into the fight, or keep him hammering? Pulling skilled craftsmen into combat squads is usually a mistake, because their production loss lasts far longer than the wave does.
Build squads from colonists with combat aptitude and mediocre crafting scores. Two properly equipped fighters beat four unarmored bodies, so resist the urge to draft everyone. Keep the squad stationed near the tunnel mouth, since that is where waves funnel once you wall the surface.
Gear Upgrades That Change Wave Outcomes
Armor changes wave outcomes more than weapons do. A fighter who survives contributes to the next wave too, while a slightly faster kill saves you nothing. Prioritise body protection first.
Upgrade in full sets rather than piecemeal across the squad. One fully equipped fighter holds a line that three half-equipped ones will break. As the goblin hordes scale with colony size, plan one gear refresh per two in-game years. That cadence lines up neatly with the merchant’s arrival, which is not an accident.
How Colonist Skills, Wealth, and Migrants Work
Colonists gain skill by repeating the same job, so a farmer who farms all year becomes a genuinely better farmer. No experience bar or class menu governs this. Work is the progression system.
Colony wealth runs alongside it as the second progression track. A richer, better developed settlement attracts migrants from outside, which is how a five person expedition grows into something that can hold five layers. Growth compounds, because more hands mean more production, which means more wealth.
Rank and reward here are indirect. You unlock nothing with a button. Instead, milestones arrive as capability: the moment you can staff a second workshop, the moment you can garrison a tunnel and still farm, the moment a wave stops being frightening.
How Skills Grow Through Repeated Work
Rotating jobs constantly keeps everyone mediocre. A colonist who mines on Monday and farms on Tuesday improves at neither. Therefore locking roles early pays dividends by the second in-game year.
Watch for quirks that fight your assignments. Some units simply perform poorly at certain work, and no amount of repetition fixes that. Reassign those colonists rather than waiting them out. One well-matched specialist outproduces two badly matched generalists, and that gap widens the longer a run continues.
How Colony Wealth Pulls In New Migrants
Wealth grows from developed space, stored goods, and functioning buildings. As it rises, the colony becomes a place outsiders want to join. New migrants arrive with their own skills and quirks, so each one is a small gamble.
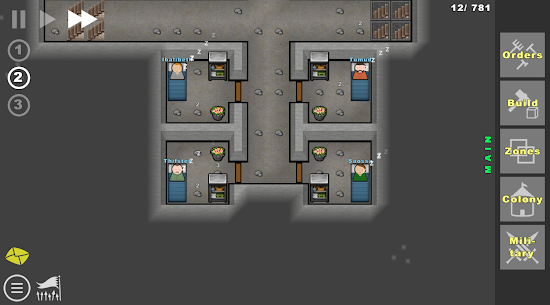
Prepare housing and food before the growth curve arrives. A migrant with nowhere to sleep drags the whole mood system downward. Consequently, colonies that expand headcount faster than infrastructure hit a wall around the point where wave size scales up. Build the beds first, then let the wealth do its work.
What a Fully Staffed Colony Unlocks
A full workforce unlocks parallel operation, which is the real reward. You can mine on layer three, farm on the surface, and run the anvil at the same time. Nothing about that requires an unlock screen.
That parallelism is what makes Campaign objectives reachable. It also changes how you handle waves, since a garrison can hold the tunnel while production continues untouched. Reaching this point in Survival is roughly where most players say the game stops feeling punishing and starts feeling like a colony.
All Three Modes: Campaign, Survival, and Sandbox
Three rule sets ship with the game: Campaign, where you complete a mission to win, Survival, where you last as long as possible, and Sandbox, where you set the world up yourself. Each one uses the same six layer structure and the same colonists, so nothing about the core simulation changes.
What changes is pressure and purpose. Campaign gives you a finish line, Survival removes it, and Sandbox lets you remove obstacles instead. Most players start with Campaign missions, then move outward from there.
Save handling stays consistent across all three, and a recent update added the option to write saves into the device Documents folder. That single feature makes running parallel colonies far less painful than it used to be.
Campaign Missions and Win Conditions
Campaign hands you a defined objective and expects you to reach it. Because the win condition is fixed, this mode rewards efficient openings over sprawling ones. Every wasted season costs you against the mission clock.
Treat the mission brief as a resource plan. If the objective sits deep, your expedition kit and early tool production should point downward from turn one. Players who build a beautiful surface settlement first usually find themselves rushing the last three layers with an underequipped squad.
Endurance Runs in Survival
Survival strips out the finish line and simply asks how long you last. Waves keep scaling, resources keep depleting near your base, and the pressure never resolves. This is where the simulation shows its teeth.
Sustainability beats speed here. Rotate mining sites before they run dry, keep a food surplus rather than a food balance, and refresh gear on a schedule instead of reacting to losses. Because there is no ending, the colonies that last are the ones built to absorb one bad season without collapsing.
World Customisation in Sandbox
Sandbox lets you configure the world and play on your own terms. Threat levels, starting conditions, and world setup all bend to your preferences. Some players use it purely as a testing ground before committing to a Campaign run.
Reviews are split on how deep this customisation actually goes, and a few players feel it stops short of a true sandbox. Even so, it is the fastest way to try a build order without risking an hour. Use it to test tunnel routes and workshop layouts, then carry what works into a real colony.
What the Visiting Merchant Sells Every Two Years
A traveling merchant reaches the colony once every two in-game years and brings goods you cannot produce yourself. That two year gap is the tightest scheduling constraint in the entire game. Miss the window, and the next chance is two more years out.
Some of what he carries has no crafting recipe anywhere, which makes each visit a genuine decision rather than a shopping trip. Trade goods you can replace, and hold the ones your production line depends on.
Preparation decides whether the visit helps. A colony with nothing worth trading gets nothing useful, no matter how good the merchant’s stock is that year. So the two year cycle should shape your production planning, not interrupt it.
Preparing Trade Goods Before the Two Year Mark
Start setting surplus aside about a season before the merchant is due. Crafted goods generally carry more trade value than raw materials, so run the anvil on tradeables once your own tool needs are covered.
Do not strip your stockpile bare. Players who trade away their working stone reserve for a shiny item routinely stall out the following season. Keep enough raw material on hand to finish whatever construction is currently queued, then trade the remainder.
Items You Cannot Craft Yourself
The uncraftable stock is the whole reason to care about the merchant. These items fill gaps your workshops physically cannot, and passing on one means waiting two full years for another shot.
Judge each offer against your bottleneck, not against its rarity. If your colony is losing colonists to waves, defensive value wins. Similarly, if production has stalled, anything that speeds up your crafting chain outperforms a rare curiosity. The wrong purchase is not just a wasted trade. It is a wasted two year cycle.
Building a Bridge So the Merchant Can Reach You
Merchants sometimes arrive on the far side of a river, and players report needing a stone bridge before any trade can happen. Discovering this on arrival day means the visit is already lost.
Scout your surroundings during the first year and note any water between your colony and the map edge. Stockpile the stone for a crossing well ahead of the two year mark. This single piece of preparation has cost more colonies a trade window than any combat mistake, and almost nobody mentions it.
Common Mistakes That Kill a Colony Before Year Two
Most failed colonies die from hunger and mood, not from goblins. The store reviews make this pattern obvious. Players describe farmers who stop planting, colonists who slide into depression, and settlers who walk away carrying the colony’s only pickaxe.
None of these failures announce themselves. No warning banner appears, and the simulation simply degrades until production stops. That is why checking individual unit panels matters more here than in most colony management games.
Three failure patterns account for the overwhelming majority of dead runs. Each one has a fix that costs almost nothing if applied early.
Starving Farmers Who Stop Planting Seeds
A hungry farmer will not plant. That is the loop players hit hardest, and it is genuinely circular: no food means no planting, and no planting means no food. Once the loop starts, five colonists cannot dig their way out of it.
Break it by keeping a food buffer rather than a food balance. Bread from the expedition kit exists precisely to cover the gap before your first harvest lands, so eating into it early is fine. What is not fine is reaching zero stored food while your farmland is still bare dirt.
Sad Colonists Who Leave and Take Tools With Them
A colonist who reaches a low enough mood may leave the colony entirely, and departing units take their equipment with them. Losing your only pickaxe this way can end a run outright, since stone production stops and no replacement can be forged.
Craft one spare tool of each critical type as insurance, even before you need it. Also address mood problems the moment you notice a unit ignoring assigned commands, because that behaviour is the visible symptom. Housing, food, and a working market are the three levers available, and using all three costs less than replacing a lost specialist.
Digging Too Deep Before Your Squads Are Ready
Depth is tempting because richer materials sit below. Rushing there with wooden tools and no armed escort is the third common way colonies end. Threat scales with layer, and the game does not soften that curve for unprepared players.
Set a simple rule: no new layer until every miner has a tool and at least two fighters have real armor. Following it costs you a season or two of slower expansion. Ignoring it costs you the colonists who would have done the expanding.
Best Going Deeper! : Colony Sim Tips for New Players
The strongest opening keeps the default anvil and bread in the expedition kit, changes only the seed choice, and drives the first workforce straight at wood and stone. Then a well and a market go up before anything else. That order comes from the highest-voted player advice on the store page, and it holds up across Campaign and Survival alike.
New colonies fail on fundamentals rather than on tactics. Water, food, and tools carry more weight than any clever layout. Because the simulation punishes shortages rather than mistakes, buffers beat optimisation in the first hour.
The three habits below cost nothing and change the outcome of a first run more than any late-game decision does.
Keep the Anvil and Bread in Your Expedition Kit
The default first two items are worth defending. Bread covers the food gap before your first harvest, and the anvil is the entry point to your entire crafting chain. Swapping either one for something that looks more exciting is the most common opening error.
Change the seeds instead. Potato seeds are a popular pick because they establish a reliable food supply quickly, and food reliability outranks food variety early. Everything else in the kit is negotiable. Those two items are not.
Place the Well and the Market Before Anything Decorative
A well and a market are the two buildings that repay themselves fastest. Water access removes a constant drag on your workforce, and the market supports both trade and colonist mood. Getting both up early stabilises a colony that would otherwise wobble through its first winter.
Skip decoration entirely until these exist. Aesthetic buildings do help mood, but not enough to justify the wood and stone at that stage. Once the well and market are running, then spend surplus on comfort.
Watch the Food Meter Before You Send Anyone Underground
Check stored food before committing colonists to a deep dig. Miners far from the surface consume time as well as supplies, and a food shortfall while half your workforce is underground turns into the starvation loop within days.
Set a personal threshold and hold to it. If stored food would not cover the colony for a full season without new harvests, the tunnel waits. This one habit prevents more collapses than any combat preparation, because goblins take colonists occasionally while hunger takes everyone.
Frequently Asked Questions About Going Deeper!
Is Going Deeper! : Colony Sim free on Android?
Yes. Going Deeper! : Colony Sim installs free from Google Play, and the listing shows advertising with no in-app purchases attached. Content rating sits at 7+ with mild violence and fear flags, so it suits younger strategy fans. Nothing in the progression sits behind a payment barrier at any point.
Is the game too hard for beginners?
It is demanding, and the 4.1 star average across roughly 9,870 ratings reflects a genuine split between players who enjoy that and players who bounce off. The tutorial is short and leaves a lot unexplained. Expect to lose your first colony, then treat that run as reconnaissance rather than failure.
Is there anything to do after the campaign missions?
Plenty. Survival runs have no ending, and world customisation lets you rebuild under different conditions each time. A recent update also added saving to the device Documents folder, which makes keeping several parallel colonies far easier. Most long-term players cycle between rule sets rather than replaying identical objectives.
Who Should Install This Underground Colony Sim
This one suits patient strategy players who enjoy watching a system misbehave and figuring out why. Anyone wanting quick wins or a gentle tutorial should look elsewhere, because the opening hour is genuinely unforgiving. Fans of deep management sims on Android will find more simulation here than the presentation suggests.
My honest verdict after several runs: I lost two colonies to hunger before anything clicked, and the third one taught me more about resource planning than any polished mobile builder has. It rewards preparation and punishes optimism. For a free offline title, that is a remarkable amount of game.
Images
Download links
ℹ️ Download link not working? Please refresh the page and try again.
Related apps





What's new
* Major performance improvements in the late game
* Major bug fixes
* Save to external folder button in options menu (game save will be written in /Documents/)
New Apps
Most Played Mobile Games


