
Farming Simulator 14 MOD APK (Unlimited Money)

Description
Farming Simulator 14 starts you in an old combine harvester, facing a ripe wheat field you already own. New farmers who keep running out of diesel money before the second harvest will find the working order here. The fastest early money comes from rotating three grain types across five selling points, not from buying a bigger harvester.
How to Play Farming Simulator 14 From Your First Field
Farming Simulator 14 puts you in charge of a small farm with two fields and three grain types to sow. You harvest wheat, canola or corn, haul the load to one of five selling points, then cultivate and sow the same ground again.
That loop never really changes. However, the scale of it does. Your starting fleet is a combine harvester, a tractor, a tipper, a cultivator and a sowing machine, and every later purchase simply speeds up one link in that chain.
The two starting fields sit at different stages on purpose. One waits ripe for the combine harvester. The other sits cultivated to the north west, ready for the sowing machine. Career mode gives you both so the first ten minutes teach two jobs instead of one.
The Harvest, Sell, Cultivate, Sow Loop Explained
Harvesting comes first because you already own a full field of wheat. Tap the wrench icon to start the engine, then slide the speed lever up and drive straight into the crop. Grain fills the harvester tank while straw drops behind you in a line.
Once the tank fills, the harvester stops. You reverse a tractor into the tipper, park it under the unloading pipe, and the transfer starts on its own. After that, the grain goes either to a silo at the farm or straight to a selling point. Cultivating and sowing then reset the field for the next round.
The Farm Setting, Village Layout and Career Tone
The farm sits at one corner of a compact rural map, with the village, the shop and the buyers spread across the rest of it. There is no story, no dialogue and no villains. Your bank balance is the plot.
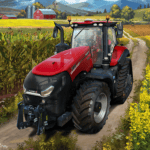
Buildings on the map each do one job. Silos store grain, the cowshed holds cattle, and the fertilizer tank, seed pallets and diesel pump refill your equipment for a fee. Case IH, Deutz-Fahr, Lamborghini, Kuhn, Amazone and Krone equipment fills the shop, and the Case IH Puma 160 on the title screen sets the tone immediately.
Farming Simulator 14 vs Hay Day and Township on Android
Hay Day and Township both sit in the same Android farming category, yet they play nothing alike. Those two run on timers, taps and social trading. You wait for crops, then collect with a finger tap.
This title asks for driving instead. You physically steer a machine down every row, and the field only counts as worked where the tool actually passed. For example, a missed strip in Hay Day is impossible, while here it stays visibly unharvested until you go back. Players who want a relaxed tapping farm should pick Hay Day. Players who want machinery and logistics belong here.
Android Version vs the 3DS and PS Vita Releases
The same game shipped on Nintendo 3DS and PlayStation Vita as a paid release, while the Android build stays free with in-app purchases. Content overlaps heavily, so the difference is money and input.
Handheld versions give you physical sticks and buttons, which makes fine steering easier during silo alignment. Touch controls trade that precision for tilt steering and on-screen sliders, though the Android build wins on convenience and price. Save files do not transfer between the two, so pick one platform and stay on it.
Gameplay Controls: Tilt Steering and the Action Bar
Steering in this sim works by tilting the device left or right, with a slider alternative offered for tablets. A speed slider handles acceleration, braking and reverse, while dragging a finger across the screen rotates the camera or zooms it in and out.
The HUD keeps nine elements on screen at once. Bank balance, fill level, fuel, speed, the map, the vehicle switch button, the Farming Shop, options and the action icons all sit within thumb reach.
Action icons change depending on what you are driving. A wrench starts the engine. Other icons lower a tool, raise it, detach it, or call a farmhand. Fuel matters more than new players expect, since an empty tank strands a machine wherever it dies.
Driving, Steering and Camera Controls on Touchscreens
Tilt steering feels loose for the first ten minutes and then clicks. Hold the device flat, then angle it gently rather than jerking it. Small corrections keep the combine harvester tracking along a straight edge, which matters because overlapping passes waste time and diesel.
Tablet players should switch to the steering slider instead. The larger screen makes tilting awkward, especially in a two-handed grip. Camera drag also helps here. Swinging the view behind the machine before reversing into a tipper saves several failed attempts.
Attaching and Activating Tools Behind Your Tractor
Attaching works by reversing the tractor toward a tool until the game snaps them together. No button press is needed for the connection itself. Approach from the wrong side, though, and nothing happens at all.
Activation is a separate step. Tapping the action icon lowers the cultivator, sowing machine or fertilizer spreader into working position, and tapping again raises it. Many first-time farmers drive a full lap with the tool still raised and wonder why the field never changes state.
What Happens When a Field Finishes Harvesting
A harvested field turns to stubble and stops producing anything. Straw lies across it in rows, which a baler can press into straw bales later on. Until you own one, that straw simply sits there.
The field then needs the cultivator before it accepts seed again. Field states run through seven visual stages, from cultivated to sown, through two growth stages, to ripe, harvested and finally dead. That last state is the punishment for leaving ripe crops standing too long, because rot destroys the whole yield.
How to Unlock Bigger Machines in the Farming Shop
The Farming Shop opens at any time from the HUD and sells every tractor, combine harvester, trailer and implement in the game. New equipment appears at the shop in the village rather than at your farm, so you drive a tractor over to collect anything you buy.
Two rules shape every purchase decision. First, you can own a maximum of 45 machines at once. Second, selling anything back returns three quarters of its original price.
Some items sit behind a lock icon and unlock through an in-app purchase, which also hands you a bonus vehicle or tool at the shop. A restore button brings those unlocks back on a new device. Everything else comes down to your bank balance.
The 45 Machine Limit and What It Means for Buying
Forty-five sounds generous until you count implements. A single tractor, a cultivator, a sowing machine, a fertilizer spreader, a tipper and a mower already burn six slots for one workflow. Building a full hay chain plus a corn chain plus spare tractors fills the yard faster than most players expect.
Because of that ceiling, replacing beats collecting. Sell the starter cultivator once a wider one arrives instead of parking it behind the barn forever. The slot is worth more than the sentiment.
Locked Equipment and the Bonus Vehicle Unlock
Locked shop entries carry a padlock icon and stay unavailable until you unlock them. The unlock is a paid transaction rather than a gameplay milestone, so no amount of harvesting removes the padlock.
There is one detail worth knowing before you decide. Each unlock also drops a free vehicle or tool at the shop as a bonus, which softens the cost slightly. Players who never spend can still finish everything, because the standard fleet covers all three grain types and the entire hay chain.
Selling Old Kit Back at Three Quarters Price
Resale returns 75 percent of the purchase price, with no depreciation for hours used. That flat rate makes equipment surprisingly liquid. A tractor bought early is not a sunk cost, and swapping it later stings less than in most sims.
Use that to your advantage when a job needs a bigger machine only once. Buying, working, then selling costs you a quarter of the sticker price as a rental fee. Compared with letting a rarely used machine occupy one of your 45 slots, the trade often makes sense.
How to Unlock Milk Income From the Cowshed
Milk income unlocks by feeding hay bales to the cows already living behind the barn at the start of career mode. Once the animals are fed, a milk tank appears beside the cowshed, and you tow it to any selling point exactly like a grain trailer.
Nothing about that chain is quick. You need a meadow, a mower, a tedder, a windrower and a baler before a single bale exists.
The payoff justifies the setup. Milk sits among the highest value goods on the map, so a running cow operation quietly out-earns a single grain field. Straw bales add a second benefit on top, since bedding produces manure at the farm heap.
Mowing, Tedding and Windrowing Grass Into Hay Bales
Cutting grass is only step one. Fresh cut grass will not bale, because the baler needs dry hay. Running a tedder over the cut grass dries it, and only then does the machine accept it.
Adding a windrower between those steps saves real time. It sweeps loose hay into tidy rows, so the baler collects far more per pass. Player-reported shop prices put a tedder near 10,000 and a Kuhn twin mower near 42,000, with the Krone baler around 76,000 and the Arcusin autostack around 52,000. Building the chain in that order spreads the cost sensibly.
Feeding Cows and Hauling the Milk Tank to Buyers
Dropping hay bales at the cowshed is the whole feeding action. No menu, no timer, no feeding minigame. Cows eat, then milk accumulates in the tank parked alongside.
Full tanks need hauling. Hitch it, drive to whichever buyer pays best, and unload over the grille the same way you handle grain. One detail catches people out constantly. You must bring the empty tank back to the shed, otherwise production has nowhere to go and your cows earn nothing.
Straw Bales, Manure and Free Fertilizer
Straw comes free with every wheat and canola harvest, lying in rows behind the combine harvester. Baling it and dropping those bales at the cowshed turns it into bedding.
That bedding fills the manure heap at your farm. A manure spreader loads from the heap at no cost, then spreads across any field as a direct substitute for bought fertilizer. Most beginners buy fertilizer for months without noticing this loop exists, which is a straight waste of money on a farm that already produces straw every single harvest.
How Crop Prices and Silo Storage Drive Progression
Crop prices in this sim move dynamically based on how often and how much of each grain type you sell. Dumping canola repeatedly pushes its price down until the runs barely cover diesel, while a grain type you leave alone climbs steadily higher.
Silos exist to let you wait out those swings. Three storage silos sit at the farm, each labelled with one grain type.
Progression follows directly from that pricing. A bigger bank balance buys wider tools, wider tools work more hectares per hour, and more hectares fund fields bought from the map with the plus icon. Achievements track the milestones along the way.
The Dynamic Market Across Five Selling Points
Five buyers accept goods: the station, the mill, the harbour, the inn and the biogas plant. Each one quotes its own price, and those quotes update as the market reacts to your sales volume.
The statistics screen in the options menu lists every current price in one place. Checking it before loading a tipper takes five seconds and routinely changes where you drive. Here is the part competing articles skip entirely. Because price decay is driven by your own selling behaviour, the market is effectively a resource you can exhaust, and rotating grain types is the only way to regenerate it.
Storing Wheat, Canola and Corn in the Farm Silos
Storing grain means reversing a loaded tipper over the grille beside the three silos. The unload starts automatically once the trailer sits correctly. Each silo only accepts the type printed on it.
Loading works in reverse. Steer the tipper underneath the silo you want, and the pipe opens by itself. Storage costs nothing, so there is no penalty for holding a full harvest for a while. Patient farmers sell wheat while canola recovers, then flip the order, and the silos make that rhythm possible.
Achievements From Nouveau-Riche to Harvest King
Fifteen achievements track long-term play. Wealth tiers run through Nouveau-Riche at 1 million, Well-Heeled at 5 million and Pots of Gold at 10 million. Distance driven splits into Trucker at 10 km, Mobile Farmer at 100 km and Very Frequent Driver at 1000 km.
Farm work has its own ladder. Sowing milestones run from Green Thumb through Sower to Mass Production at 100 hectares, while harvesting climbs from Peasant to Fruits of Your Labour and finally Harvest King. A Helping Hand and The Philanthropist reward mission work, and Diesel Tycoon arrives after 1000 litres of fuel burned.
Biogas Plant Chaff Runs and the Slurry Tank Loop
The biogas plant buys chaff at the best rate on the map, though the fermenting duration caps how much it takes at a time. Delivering grain or chaff there also fills a slurry tank sitting beside the plant.
Chaff comes from chopping corn rather than threshing it. The Krone Big X forage harvester handles that job, and since it carries no tank of its own, a trailer must run behind it constantly.
The slurry tank turns those deliveries into free fertilizer. Owning a slurry tanker lets you refill at no charge, then spray any field you like. Consequently, a corn operation pays you twice, first in cash and then in saved input costs.
Chopping Corn With the Krone Big X Forage Harvester
Corn behaves differently from wheat and canola. A standard combine harvester cannot touch it without a specially designed corn cutter, which is why the game warns new players not to sow corn on day one.
The forage harvester takes another route entirely by chopping the crop into chaff. Because it has no onboard tank, the trailer behind it is not optional. Losing that trailer mid-field stops the harvest instantly, so hiring an assistant to drive the tractor alongside keeps the run flowing.
Why Chaff Pays Better Than Raw Grass
Loose grass sells at the biogas plant too, and it works fine as an early income source before you own a baler. Chaff simply pays more per load.
Fermenting time is the limiter. Deliver too much too quickly and the plant slows its intake, so back-to-back chaff runs hit diminishing returns. Splitting deliveries between the biogas plant and a grain buyer keeps both income streams healthy. That rhythm matters more once your fields grow large.
Refilling Slurry Free and Fertilizing Fields
Slurry accumulates in the tank silo based on what you have already delivered. No delivery means no slurry, so the loop only rewards active players.
Filling costs nothing at all. Drive the slurry tanker to the tank silo, wait for the fill, then spread it across young crops for the same yield boost a bought fertilizer gives. Between this and the manure heap, a well-run farm never needs to buy fertilizer again, which is easily the most overlooked saving in the whole game.
Missions, Hired Assistants and Local Multiplayer
Missions appear at regular intervals and ask you to complete a specific task within a time limit. Accepting one sets a flashing indicator on the map and starts a countdown, with a cash reward on completion.
Assistants change the pace of everything else. Hiring one hands over the controls of whatever vehicle you are driving, freeing you to run a second machine somewhere else on the map.
Multiplayer works locally over WiFi or Bluetooth in a free roaming open world. Two players share one farm, which turns the harvest and haul cycle into a genuine two-person operation. No internet connection is involved at any point.
Timed Missions and the Flashing Map Indicator
Missions arrive without warning and expire if ignored. The flashing indicator shows exactly where to go, so navigation is never the challenge. Distance is.
Accepting a mission on the far side of the map while your combine harvester sits half full is a common trap. Check what your current machines are doing first. Missions pay well relative to effort, and stacking them alongside a farmhand working a field is the cleanest way to double your income per session.
How Hired Assistants Charge Wages and Fuel
Farmhands are not free labour. Wages accumulate by working hours, and diesel, seed and fertilizer costs deduct automatically while they operate. A worker left running on a finished field keeps billing you.
Positioning matters enormously. Park the vehicle in a corner of the field before tapping the assistant icon, and the worker covers the entire area properly. Start them in the middle instead and coverage gets patchy, which means a second pass and a second wage bill.
WiFi and Bluetooth Multiplayer With a Friend
Local multiplayer needs both devices running the game on the same WiFi network or paired over Bluetooth. There are no servers, no accounts and no matchmaking queues.
Division of labour is where it shines. One player runs the combine harvester while the other shuttles tippers to the silos and buyers, which removes the single biggest bottleneck in solo play. For example, a two-person corn and chaff run keeps the forage harvester moving almost continuously. Solo, that same job stalls every time the trailer fills.
Common Mistakes That Quietly Drain Your Bank Balance
Ripe crops rot if you leave them standing, which turns a full field into a total loss with no warning message. That single rule causes more early bankruptcies than any other.
Two other habits cost almost as much. Selling one grain type over and over collapses its price, and ignoring the filling stations strands machines mid-field.
None of these mistakes announce themselves. Your bank balance simply stops growing while the hours keep passing. Fixing all three costs nothing except a change in routine, and the difference shows within two or three harvests.
Sowing More Than You Can Reap Before Crops Rot
Sowing every owned field at once feels productive. It is not, unless you can harvest all of them in time. The game states the rule plainly: only sow as much as you can reap.
Staggering solves it. Sow one field, let it grow while you work the meadow or run missions, then sow the next once the first approaches ripeness. Consequently, your harvester always has exactly one job waiting rather than three jobs competing.
Flooding One Grain Type and Crashing Its Price
Wheat is the obvious early crop because you start with a field of it. Selling nothing but wheat, though, drives its price steadily downward until the runs stop being worth the diesel.
Canola and corn exist as price relief, not just variety. While wheat recovers, sell canola. Corn takes longer to set up because of the cutter requirement, yet it becomes the strongest earner once the forage harvester arrives. Three crops rotating means three prices recovering in turn.
Skipping the Filling Stations Until Something Stops
Diesel, seeds and fertilizer all run out mid-task, and refilling is never free. The fertilizer tank, seed pallets and diesel pump each sit at fixed points on the map, and each begins filling automatically once you park close enough.
Topping up between jobs prevents the worst outcome. An empty sowing machine halfway down a field means driving back, refilling, and re-covering ground you already crossed. Similarly, a farmhand working with an empty tool burns wages while achieving nothing at all.
Best Farming Simulator 14 Tips and Tricks for Beginners
Three habits separate a farm that grows from a farm that stalls. Corner positioning before hiring a worker, deliberate crop rotation, and buying a second tractor before a bigger harvester.
Each one costs nothing extra. They are ordering decisions rather than spending decisions, which is why they work from your very first hour.
Everything else scales from there. Once two machines run in parallel and your prices stay healthy, the bank balance climbs fast enough to fund the hay chain and the corn setup within a few sessions.
Corner Parking Before You Hire a Farmhand
Assistants work outward from wherever you leave the vehicle. Starting them mid-field leaves untouched corners and forces a cleanup pass later.
Drive to a corner, line the tool up with the field edge, then hire. The worker covers everything in one continuous run. Over a long session that habit saves more wage money than any equipment upgrade, because you pay for one pass instead of two.
Rotating Wheat, Canola and Corn to Hold Prices Up
Treat the three grain types as a rotation rather than a preference. Sell wheat this cycle, canola next, corn after that, and each price climbs back while the others carry the income.
Storage makes the rotation practical. Fill the silos during good harvests, check the statistics screen for current buyer prices, then release whichever crop is peaking. Farmers who sell everything the moment it leaves the field are always selling into their own depressed market.
Buying the Second Tractor Before the Bigger Harvester
A larger combine harvester is the tempting first upgrade. Resist it. One machine can only do one job at a time, no matter how wide its header is.
A second tractor doubles your parallel capacity instead. One works a field under a farmhand while you cultivate, haul or run a mission with the other. Adding a fertilizer spreader shortly afterward raises yield on every field you treat, so those two purchases together outperform a single expensive harvester by a wide margin.
Frequently Asked Questions About Farming Simulator 14
Is Farming Simulator 14 free on Android?
Yes. The Google Play listing offers it at no cost with optional in-app purchases for locked shop equipment. Downloads have passed 100 million, with a 3.9 star average from roughly 1.01 million reviews. Android 2.3.3 is the stated minimum requirement, so older phones still run it fine.
How do you make money fast at the start?
Run timed missions between field jobs. They pay well for a few minutes of driving, unlike a full crop cycle that takes roughly ten to fifteen minutes with a farmhand working. Milk is the highest value good long term, though its equipment chain needs several hundred thousand before it pays anything.
Can you play with a friend without an internet connection?
Yes. The local multiplayer runs over WiFi or Bluetooth with no servers involved, so it works on aeroplane mode with Bluetooth active. Both devices need their own copy installed. You share one farm and one bank balance, and either player can drive any machine on the map.
Who Should Start a Farm in This Mobile Sim
Anyone who enjoys logistics, routing and slow compounding progress should install this one today. It suits patient players who like watching a small operation turn into a large one through better decisions rather than faster tapping. Players who want quick rewards and social features will be happier with Hay Day or Township. After many hours across several careers, my honest verdict is that the crop price system carries the whole game, and the moment it clicked for me was the run where I held a full silo of canola for two cycles and doubled my usual payout. Start with rotation, and everything else follows.
Images


Download links
ℹ️ Download link not working? Please refresh the page and try again.
Developer's apps
Related apps





What's new
Improved support on newer devices Various improvements and fixes
New Apps
Most Played Mobile Games


