
Bad 2 Bad Extinction MOD APK (Unlimited Money, Diamonds)

Description
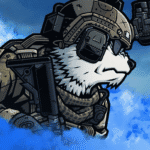
Bad 2 Bad: Extinction hands you B2B Delta Team, a unit of animal soldiers dropped into a country where a missile-borne virus turned the dead into Wilders. New squad leaders who keep bleeding currency on repair bills will find the equipment order that stops it. Proficiency training raises damage and cuts durability loss, so a cheap rifle you have trained beats a legendary one you cannot afford to maintain.
How to Play Bad 2 Bad: Extinction as B2B Delta Team
Bad 2 Bad: Extinction plays as a side-view tactical shooter where you lead a squad called B2B Delta Team. You pick an operation area, deploy your squad, complete one main mission plus random sub missions, then board the transport helicopter to keep your loot.
The campaign picks up straight after the previous entry. Your team broke Gorat al-Llama’s organization, Al-Qatala, and found humans directing it from behind.
DAWINSTONE GAMES built the whole thing around loadout decisions rather than reflexes. Because every firearm carries durability, gear choice matters more than aim. The store listing counts 20+ playable characters and 60+ weapons and armors drawn from real-life references, so the roster gives you room to specialise early.
How Deployment and Squad Combat Actually Work
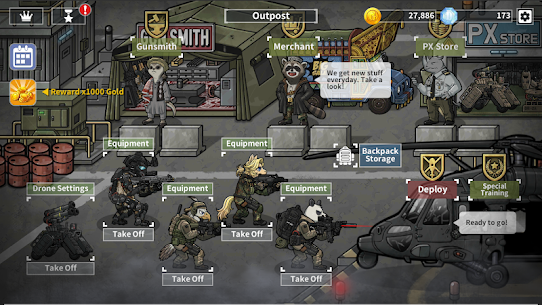
Every run starts at your headquarters. Here you sort inventory, set squad members, equip armor, and sell what you do not need. Tapping Deploy opens the operation area list, and each area carries its own enemy mix.
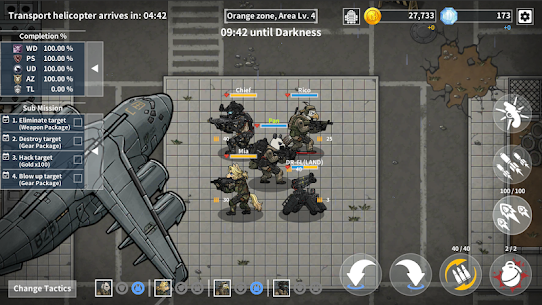
Once you land, the game assigns one main mission plus a set of sub missions. However, the main mission only activates after you have spent a stretch of time in the zone. That gap is free income, so most experienced players use it to clear buildings and stack loot first.
The Wildling Outbreak and the Tailless Legion Premise
The story frames a single missile strike as the trigger. That strike spread the Wildling Virus, the dead rose as Wilders, and the infection crossed borders into neighbouring countries.
Behind the outbreak sits the Tailless Legion, the human faction your squad now fights directly. Their presence changes the tone of the campaign. Instead of chasing one terror cell, you fight a coordinated army with its own drones and equipment tiers.
How It Compares to Space Marshals 2 and Door Kickers: Action Squad
Space Marshals 2 on Google Play runs top-down and leans on stealth, cover angles, and single-character control. By contrast, this title gives you a whole crew and an economy layer sitting under the shooting. You manage repairs and recruits between fights, which Space Marshals 2 never asks of you.
Door Kickers: Action Squad shares the side-view perspective and even lists 60 weapons and gear items of its own. Yet that game sells you a fixed premium package with 84 hand-built levels. Extinction instead rerolls its maps, so the two aim at different appetites. One rewards route memory, the other rewards adaptable loadouts.
Combat Controls, Converging Fire and Drone Support
Combat runs on two control schemes, Semi-Automatic and Manual, and you switch between them from the options menu. In Semi-Automatic the leader character targets and fires on its own. In Manual you aim and shoot every shot yourself.
Movement never changes. The player steers the leader character in both schemes, so the choice only affects trigger control.
On top of raw shooting sit two support systems. Converging Fire calls the entire crew, drones included, into a short concentrated volley. The DR-6L attack drone adds damage, while the DR-2A air drone carries no weapon at all and earns its slot through utility instead.
Semi-Automatic Control Against Manual Aiming
Semi-Automatic suits crowded rooms. When four Wilders close from two directions, the auto-targeting keeps damage flowing while you concentrate on positioning and dodging. Newer players usually clear their first operation areas faster with it switched on.
Manual pays off against armored targets and bosses. You choose which enemy dies first, and you place headshots deliberately once proficiency has raised your accuracy. Therefore many players keep Semi-Automatic for sub missions and flip to Manual for the main target.
Converging Fire and the DR-6L Attack Drone
Converging Fire makes every crew member and drone fire for roughly six seconds along the direction the leader faces. That window is short, so wasting it on a single scout hurts. Line the squad up on a doorway or a stairwell before you trigger it.
The DR-6L handles sustained pressure between volleys. Its damage is modest on its own, but it keeps firing while your squad reloads. Meanwhile the DR-2A brings no attack at all, and its value shows up in awareness rather than damage output.
What Happens When You Board the Transport Helicopter
The transport helicopter comes back around five minutes after the operation begins, and it waits once it has landed. Nothing forces you out. You can keep clearing floors for as long as your durability and health hold.
Boarding ends the run and banks everything you collected. Materials, documents, attachments, and gold all carry over. Afterwards the repair screen charges you for the durability your gear lost, and that bill is where most early progress quietly disappears.
How to Raise Weapon Skills and Proficiency Levels
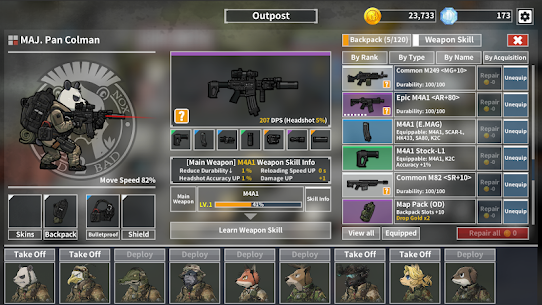
Training a weapon skill unlocks the ability to fire a gun class outside a character’s preferred type in Bad 2 Bad: Extinction. Each proficiency level then adds attack power, faster reloads, sharper headshot accuracy, and slower durability loss on that firearm.
Characters do not treat all firearms equally. Every playable soldier carries a preference, which splits their kit into a main weapon and a secondary weapon.
That split is the whole reason the skill system exists. Without the matching skill, a shotgun in the wrong hands performs far below its listed numbers. For example, an update once doubled level-up speed for pistols, grenade launchers, and sniper rifles, which tells you the developer treats these tracks as separate progression lines rather than one shared pool.
Training a Weapon Skill Outside Your Main Weapon
You pick up a weapon skill through the character’s skill panel, and each skill maps to one firearm class. Until you take it, that class stays inefficient in that soldier’s hands.
Most beginners spread skills too thin. Instead, pick one secondary class per soldier and commit. A single well-trained secondary covers the gap your main weapon leaves, whether that gap is close range, long range, or crowd damage.
What Each Proficiency Level Adds
Proficiency stacks four separate buffs: increased attack power, reduced durability loss, faster reload speed, and improved headshot accuracy. The durability line is the quiet one. Less durability loss means a smaller repair bill, so proficiency pays you in gold as well as damage.
Progress comes from use. Firing that class in real operations raises the level, which rewards consistency over experimentation. Consequently a soldier who carries the same two firearms for twenty deployments outperforms one who swaps kit every run.
Main Weapon and Secondary Weapon Preference
The main weapon slot always works at full effectiveness for that character. Your secondary slot is where the skill requirement bites, and that is the slot worth planning around.
A practical pairing puts a rifle in the main slot and a shotgun or sniper rifle in the secondary. First you cover general engagements, then you answer the specific threat the operation area throws at you. Amazoness units and Tailless Legion troops punish a squad that only carries one effective range band.
How to Recruit Squad Members at the Outpost
You build your own special force at the Outpost in Bad 2 Bad: Extinction, where every recruited soldier deploys with you. Most early crew members cost in-game gold, a few join through story progress, and a small group stays locked behind real-money purchases.
Recruiting changes the difficulty curve more than any weapon purchase. An extra body absorbs damage, adds a second firing angle, and contributes to Converging Fire volleys.
Community write-ups place the first meaningful recruit, 2LT. Rico Igelcias, at around 2000 soft currency. SFC. Dail Reiner, 1LT. Cong Woodman, and Khaled Ratel also join without real spending. Three further characters sit behind paid options, and player reviews put character prices in the six to twelve dollar band.
Recruiting Rico Igelcias and Your First Paid Crew
Rico Igelcias is the recruit most players save for first, and the reasoning is simple. He arrives early enough to matter, and his cost sits within reach of two or three solid operations plus ad rewards.
Hold your gold until you can afford him outright. Buying a mid-tier firearm first feels better in the moment, but a second soldier raises your total damage output and survivability at once. As a result your clear times drop across every subsequent deployment.
Free Recruits Against Real-Money Characters
The free roster covers every role you need. Dail Reiner, Cong Woodman, and Khaled Ratel between them give you enough variety in weapon preference to build a balanced squad without spending anything.
Paid characters bring convenience rather than necessity. Some players note that purchased characters carry less personality than the main cast, which matters if you came for the story. Nevertheless the campaign remains completable without a single purchase, and the Premium build exists for anyone who wants the smoother version.
Special Training and Crew Stat Growth
Special Training is a separate feature that raises physical strength, recovery, and operation completion rewards for your crew. It sits outside the weapon skill tracks entirely.
Treat it as compound interest. Better recovery means fewer wasted runs, and higher completion rewards feed straight back into your gold income. Because the bonus applies to every future deployment, an early investment here outperforms one more attachment.
How Gold, Durability and Weapon Crafting Work
Gold is the main in-game currency, and it pays for weapons, armor, recruits, and post-mission repairs. Every piece of gear loses durability during an operation, so higher-tier equipment charges a bigger repair bill each time you return.
Diamonds sit above gold as the premium currency, and they cover most paid characters and items in the Premium build. Arena coins form a third track tied to ranking battles.
The crafting layer adds risk. Weapon combination consumes materials, and in the free build a failed combination destroys them. The Premium build removes that penalty, which is the single clearest difference between the two versions and the reason some players buy in.
Where Gold Comes From: Loot, Supply Drops and Ad Rewards
Field loot is your baseline. Buildings hold guns, attachments, materials, and documents, and clearing floors thoroughly outearns rushing the main target every time.
Supply crates land occasionally during operations and contain a gun, an attachment, or gold outright. Ad rewards form the third stream, starting at roughly 150 gold for the first watch and climbing on the second and third watch in the same session. That stacking payout is why patient players watch all three before shopping.
Repair Bills and the Durability Curve
Here is the connection most articles skip: repair cost scales with gear tier, not with how well you played. Player reports put legendary-tier repairs above 300 gold after a single operation. A player who buys legendary gear before their income supports it can finish a successful mission and still end the session poorer.
The fix is sequencing. Keep mid-tier gear until your average operation income comfortably clears your repair total twice over. Then upgrade one slot at a time rather than the whole loadout, so a bad run never wipes your reserve.
Weapon Combination, Materials and Gear Parts
Combination lets you push firearms into higher rarity brackets, and the combination time itself was shortened from ten seconds to three in an earlier update. Materials come from field pickups and from selling gear you will not use.
Advanced gear parts come specifically from the Kill Zone map. Because those parts gate your best upgrades, players who ignore Kill Zone hit a ceiling on equipment quality no matter how much gold they hold. Save failed-combination risk for materials you can replace, not for your only advanced parts.
All Five Enemy Forces and Their Attack Patterns
Five hostile factions operate across the campaign: Wilders, Purebloods, Underdogs, Amazoness, and the Tailless Legion. Each carries its own characteristics, story thread, and behaviour in the field.
Reading those patterns is the actual skill ceiling here. The store listing puts it plainly: when you stall, upgrade equipment and change tactics.
Enemy composition also shifts by operation area, so a loadout that clears one region can fold in the next. Wilders swarm, while Tailless Legion troops fight with structure and support tools. Shield-carrying units and improved enemy AI arrived through updates, which means older strategy advice about standing still and trading shots no longer holds.
Wilders and Constant Wave Pressure
Wilders are the zombies created by the Wildling Virus, and they attack in volume rather than with precision. Buildings spawn them in waves per floor, so a slow clear invites a second wave before you have finished the first.
Positioning solves most Wilder problems. Fight in doorways and stairwells where their numbers cannot spread around you. Additionally, keep one crew member covering your back angle, since a rear breach turns a controlled fight into a collapse.
Purebloods, Underdogs and Amazoness in the Field
Purebloods and Underdogs bring organised resistance rather than raw numbers. They hold ground, use cover, and punish a squad that pushes forward without checking sightlines first.
Amazoness units force a different answer again. Against all three, a mixed-range squad matters far more than a high-tier single weapon. For example, one soldier trained on a sniper rifle can strip a defended position before your rifles ever close the gap.
The Tailless Legion and Their Drones
The Tailless Legion fields drones of its own, and an earlier bug where those drones stayed invisible in some areas got fixed in an update. They represent the campaign’s endgame threat and the story’s real antagonist.
Their fights reward preparation over improvisation. Bring full durability, a trained secondary weapon, and a Converging Fire volley you have saved rather than spent. Because their equipment matches yours in quality, sloppy openings cost far more here than they do against Wilders.
Random Maps, Sub Missions and the Kill Zone
Randomly generated maps rebuild the layout and the sub mission list every time you deploy into an operation area. The main mission stays fixed and shows on a red arrow, while the surrounding objectives reroll.
Sub mission types include elimination, rescue, target destruction, and bomb planting. Each carries its own reward, and clearing several before the main target activates is the most reliable income route in the game.
Layered on top sits the day and night cycle. An update pushed daytime to 15 minutes and added HP display at night, which tells you the developer treats darkness as a genuine difficulty modifier rather than a visual effect. Kill Zone then acts as a separate high-pressure map with its own reward table.
How Sub Missions Reroll on Every Deployment
Because the sidebar objectives change per entry, no two runs into the same area play identically. That randomness rewards flexible loadouts over memorised routes.
Check the sidebar before you move. If the roll gives you a rescue and an elimination in opposite corners, plan the order first, then commit. Players who wander and improvise routinely run out of daylight with half the board uncleared.
The Day and Night Cycle and Flare Use
Night raises the threat level sharply, and community consensus says returning to base before darkness usually beats fighting through it. Durability loss and failure penalties both hurt more when visibility drops.
Flares behave differently by location, and this is the detail almost every write-up misses. Used outdoors, a flare distracts enemies and lights a circular area at night. Used inside a building, it forces the remaining waves on that floor to spawn and ends the wave immediately, turning a slow clear into a single controlled fight.
Kill Zone and Advanced Gear Parts
Kill Zone arrived as a dedicated map, and its buildings were standardised to a three-floor minimum. Weapon damage for epic, legendary, and legendary-plus tiers was also increased specifically within it.
Advanced gear parts drop here and effectively nowhere else. Consequently Kill Zone becomes mandatory once your equipment plateaus, even though its difficulty sits above the standard operation areas. Go in with repaired gear and a full crew, never on the tail end of a long session.
Common Mistakes That Stall Your Gold and Progress
Gold loss, not enemy damage, ends most early runs in this squad shooter. Players complete the objective, extract cleanly, and still slide backwards once the repair screen charges them.
Three habits cause almost all of it, and each one is a sequencing error rather than a skill problem.
The pattern repeats across community reviews. Someone buys a legendary firearm from the shop, pays 300 plus gold to fix it after every operation, and concludes the progression is broken. In practice the progression works, but it assumes you scale your gear to your income rather than ahead of it.
Buying Legendary Gear Before Your Income Supports It
The shop will happily sell you equipment your economy cannot maintain. That purchase feels like progress and functions as a debt, because the repair bill arrives after every single deployment.
Run the arithmetic first. Add your typical operation income, subtract your current repair total, and only upgrade when the surplus covers a higher bracket twice. Otherwise you will spend your next ten runs paying for one gun.
Missing the Transport Helicopter Window
The helicopter returns around five minutes in and then waits, which fools people into treating extraction as risk-free. It is not, because durability keeps draining and night keeps approaching while you linger.
Set a personal cutoff instead. Clear your sub missions, take the main target, then leave with gear still in decent condition. A run that ends early with intact equipment beats a full clear that costs you your entire reserve in repairs.
Fighting Wilders at Night With No Flare
Darkness cuts your effective range while Wilder numbers stay the same. Squads that push into night without light lose crew members to enemies they never saw approaching.
Carry flares as standard kit, not as an emergency item. Outdoors they light a circular zone and pull enemy attention, which buys your squad the seconds it needs to reposition. Failing that, board the helicopter and take the smaller reward.
Best Bad 2 Bad: Extinction Tips and Tricks for Beginners
Ad rewards pay out on a rising scale, starting at around 150 gold for the first watch in a session. The second and third watch pay progressively more, so watching all three in one sitting earns far more than watching one across three sessions.
That stacking behaviour shapes the smartest early routine. You bank ad income first, then shop with a full wallet rather than a partial one.
Two more habits separate steady players from stalled ones: proficiency discipline and flare timing. Both cost nothing and both compound over dozens of deployments. There is no energy system here, so time invested converts directly into progress with no daily cap standing in the way.
Stack Ad Rewards Before You Recruit
Watch your available ads at the start of a session, not scattered through it. The rising payout means the third watch is worth several times the first.
Then spend deliberately. Combining a full ad stack with two solid operations gets you to Rico Igelcias noticeably faster than buying attachments along the way. Recruits scale your whole squad, while an attachment improves one slot.
Push Proficiency on Cheap Firearms First
Proficiency reduces durability loss, so a heavily trained mid-tier rifle costs less to run than an untrained high-tier one. Start there, before the shop tempts you upward.
This is the single highest-value habit in the early game. Carry the same two firearms across many deployments, let the levels accumulate, and your repair bills fall while your damage climbs. Only then does a tier upgrade make financial sense.
Trigger Flares Indoors to Close Out Floors
Indoor flares end a floor’s remaining waves at once by forcing them to spawn together. That converts a drawn-out clear into one concentrated fight you can prepare for.
Pair it with Converging Fire for the best result. Position your squad at the stairwell, throw the flare, then trigger the six-second volley as the wave commits. Similarly, keep one flare in reserve for the floor holding your main target.
Frequently Asked Questions About Bad 2 Bad: Extinction
Is Bad 2 Bad: Extinction free to play on Android?
Yes. Bad 2 Bad: Extinction is free on Google Play and the App Store, funded by ads and in-app purchases. DAWINSTONE GAMES also sells a separate Premium build that removes most ads, protects crafting materials from failure, speeds up area occupation, and runs offline.
How long does a single deployment take?
Sessions flex to your schedule. A focused run with two or three sub missions typically wraps inside the daylight window, while ranking battle matches run closer to eight or ten minutes each. Because the helicopter waits once it lands, you decide when a deployment ends rather than a timer.
Does the game have an energy system or daily play limit?
No energy meter or daily cap gates play, which is unusual for a free-to-play mobile title of this size. You can run deployments back to back for hours. Ranking battle carries its own reset limit per period, but the campaign and randomly generated operation areas stay open indefinitely.
Verdict: Who Should Deploy With B2B Delta Team
This one suits players who enjoy squad management as much as shooting, and who accept a deliberately slow currency curve. Newcomers to the series can start here without confusion, since the campaign frames the Al-Qatala fallout before the Tailless Legion arrives. I spent my first week overbuying rare firearms and repairing them into the ground, and the game only opened up once I put proficiency into two cheap rifles instead. Anyone hunting a fast, generous mobile shooter should look elsewhere. Anyone who enjoys building a crew across dozens of short deployments will get months out of it.
Images

Download links
ℹ️ Download link not working? Please refresh the page and try again.
Developer's apps
Related apps


What's new
- Updated Google Play Games
- Improved game stability
New Apps
Most Played Mobile Games


